Purchase Orders
Purchase Orders is a feature that allows users to create and manage purchase orders for items from suppliers.
Purchase Order Purpose
This feature helps users to:
- Create purchase orders for store items.
- Monitor order status — being processed, received, or completed.
- Manage purchased item data, including unit price and quantity.
- Compile reports related to purchase orders.
Purchase Order View
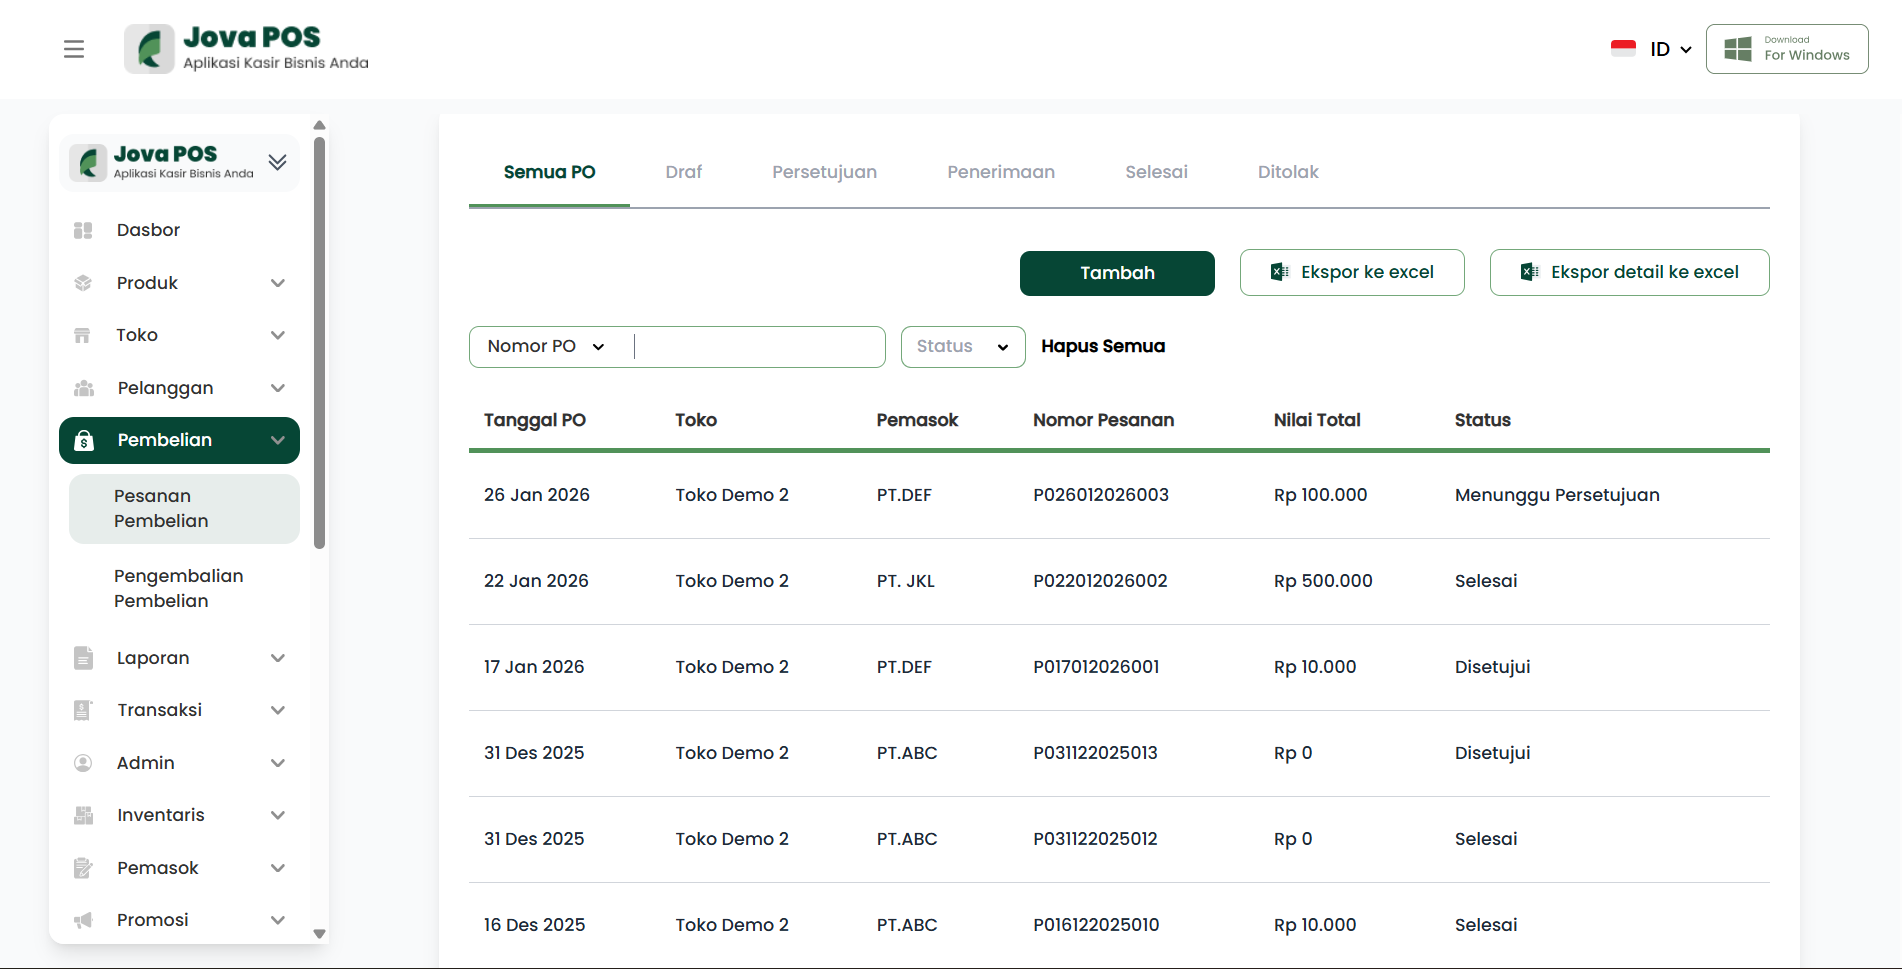
Purchase Order List
On the Purchase Orders main page, users can view a list of all existing orders. This list includes status and PO numbers for easy searching and management.
Adding a New Purchase Order
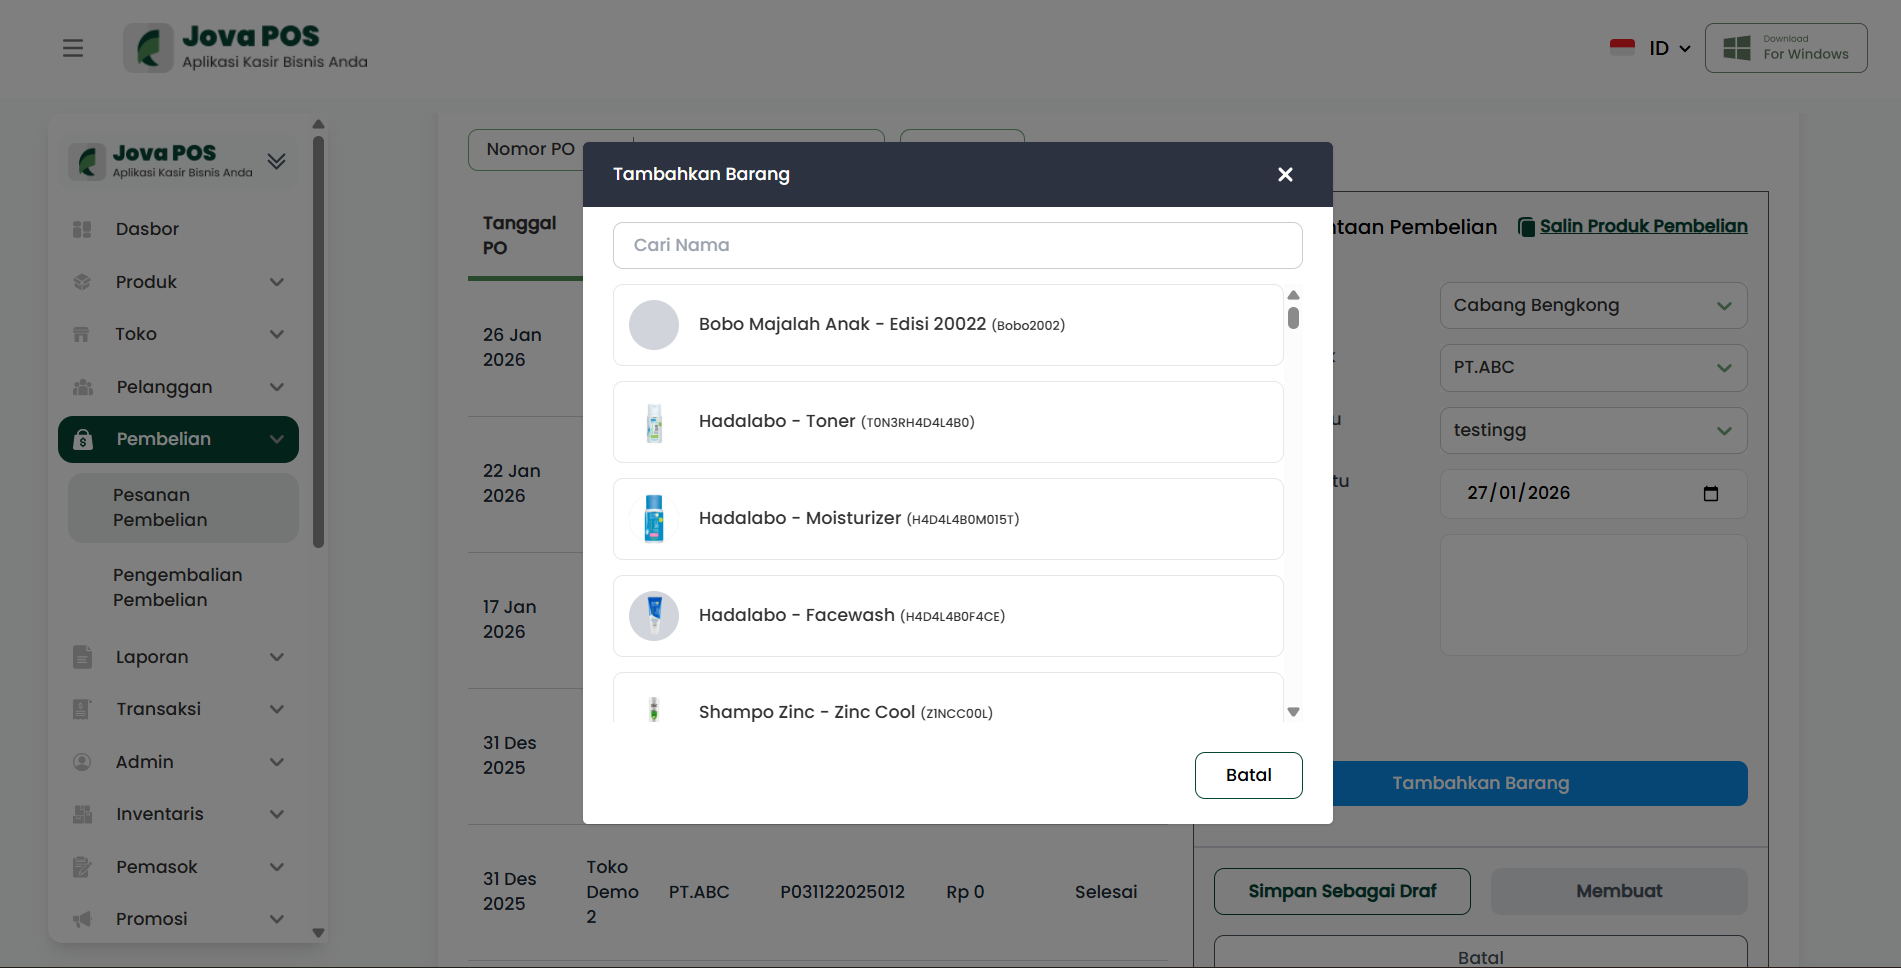
To add a purchase order, click Add Order at the top of the page. Fill in the form that appears with information such as:
- Store making the order
- Supplier providing the items
- PO Number for internal reference
- Order Date to be recorded
- Items purchased, with quantity and unit price details
Purchase Order Steps
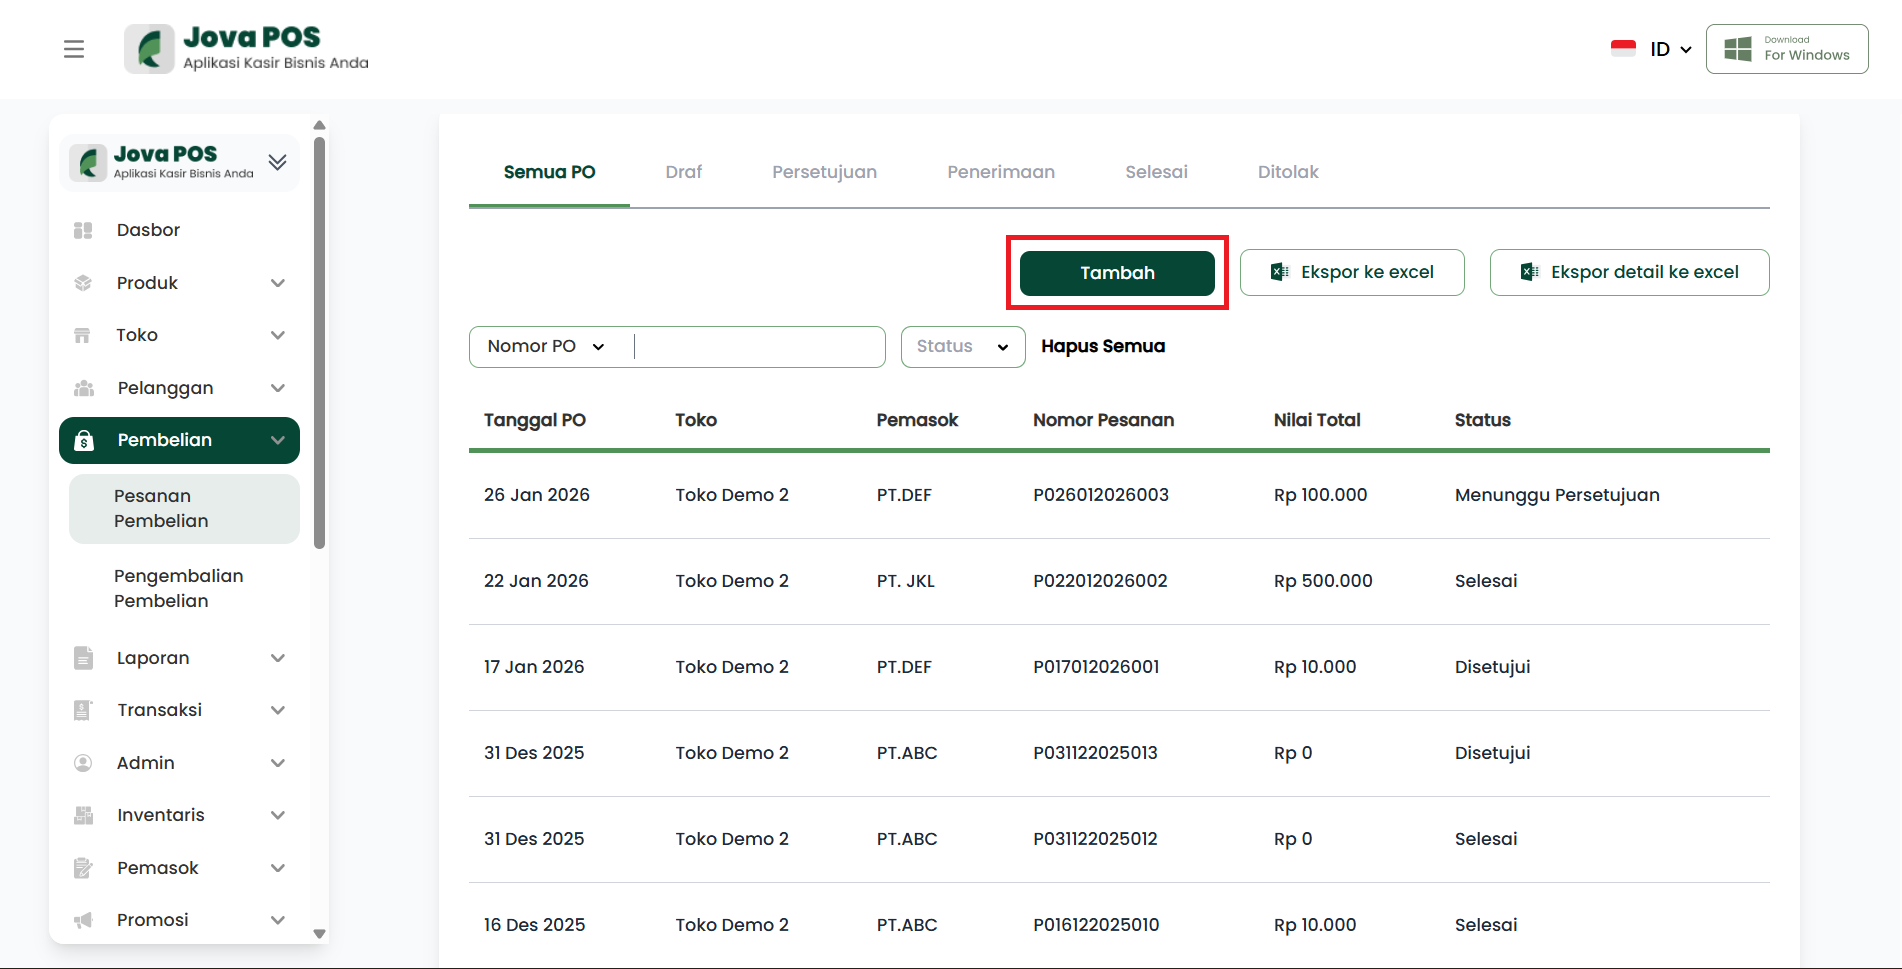
1. Adding a New Purchase Order
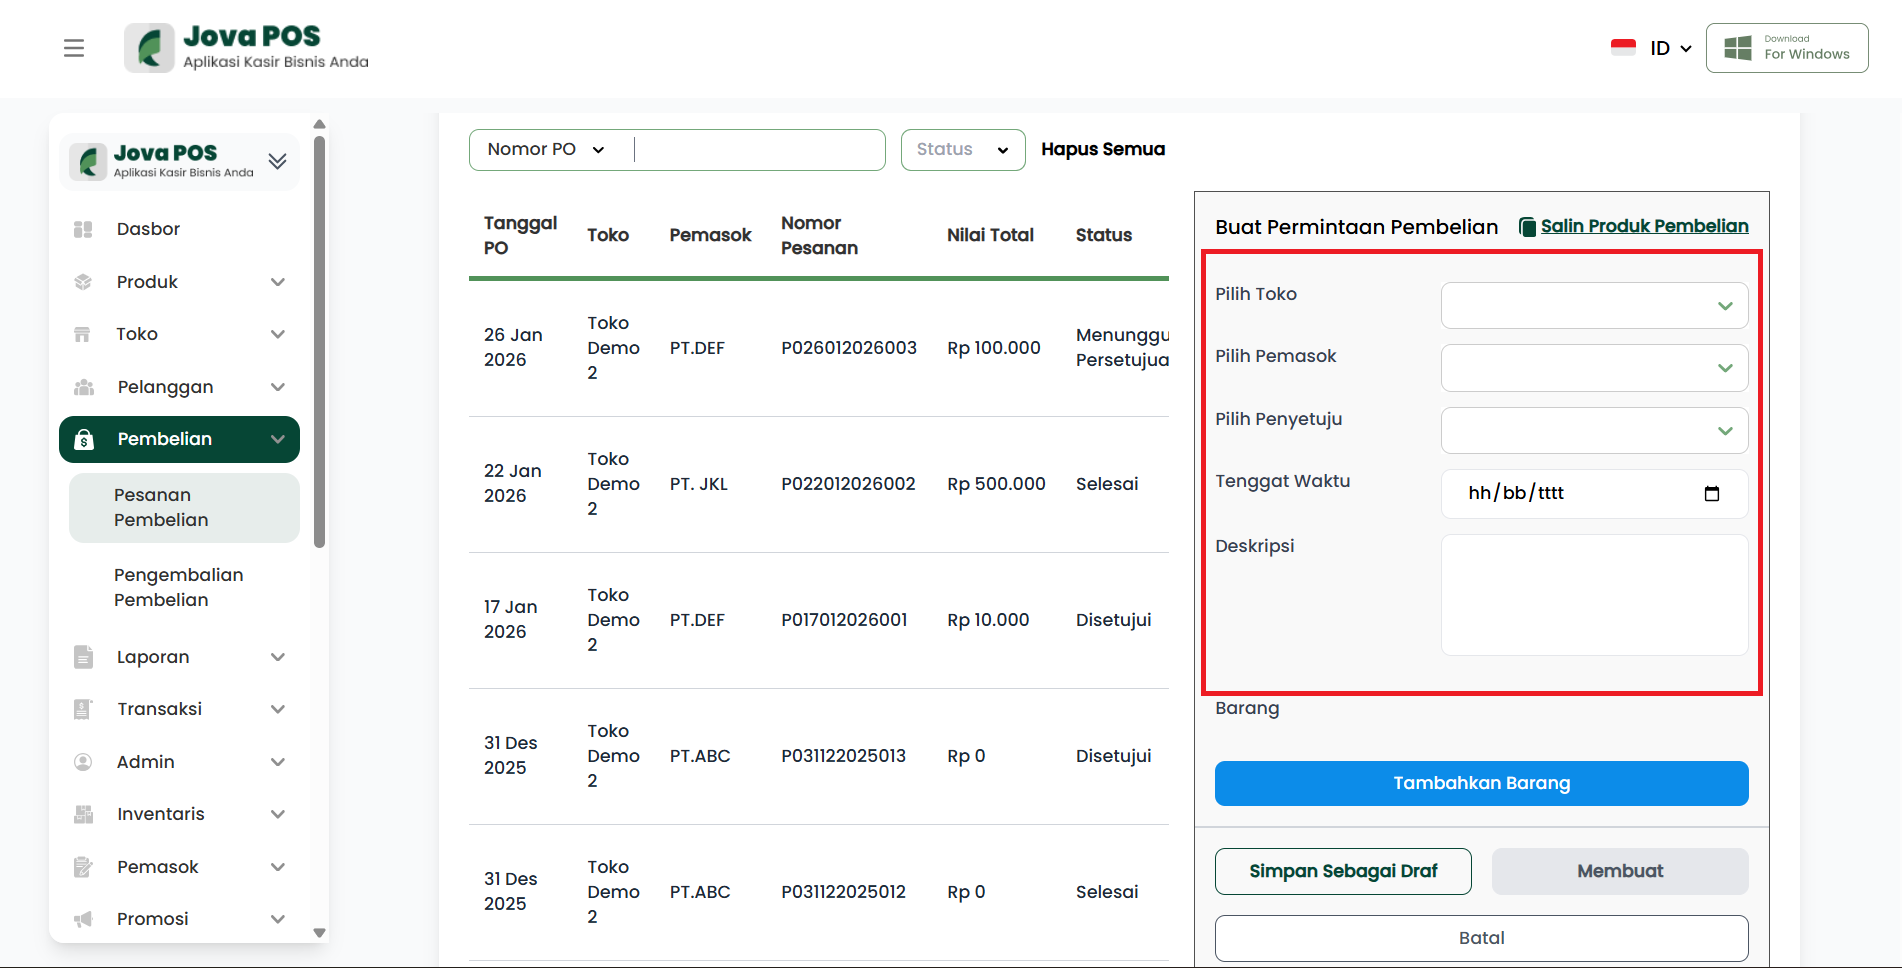
To add a purchase order, select Add Order at the top of the page. Fill in the form that appears with information such as:
- Store making the order
- Supplier providing the items
- PO Number for internal reference
- Order Date to be recorded
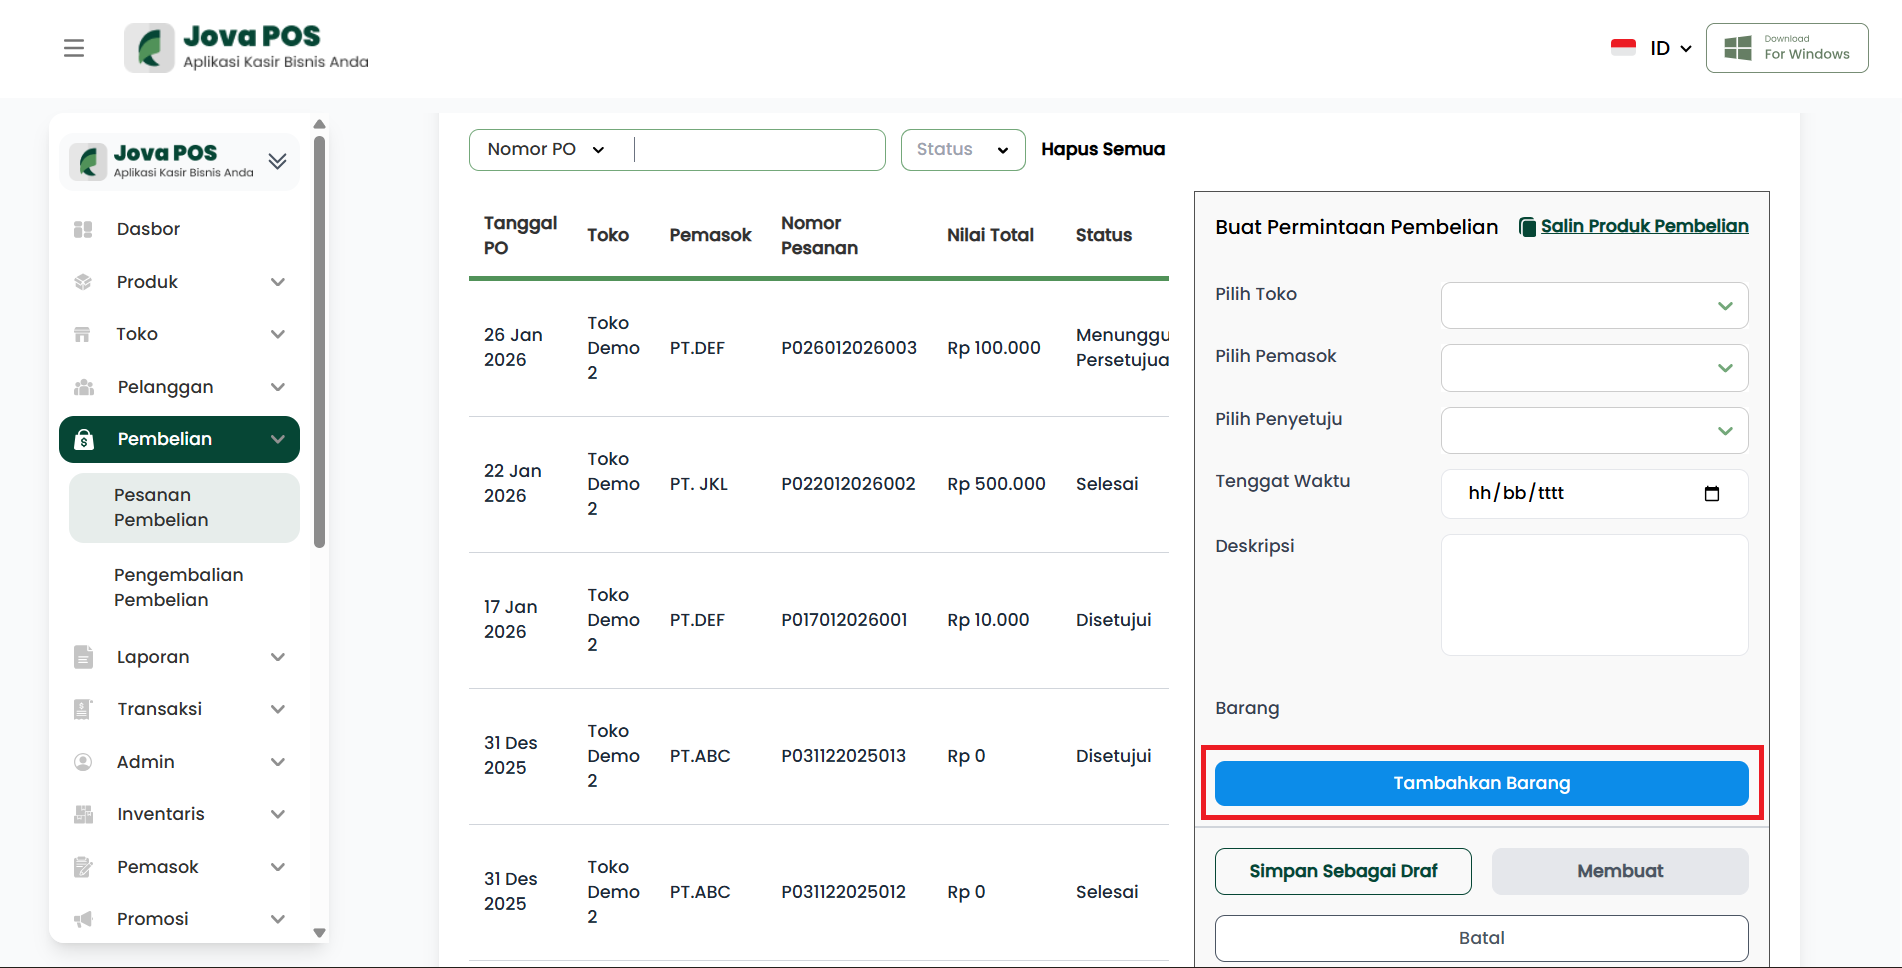
- Items purchased, with quantity and unit price details
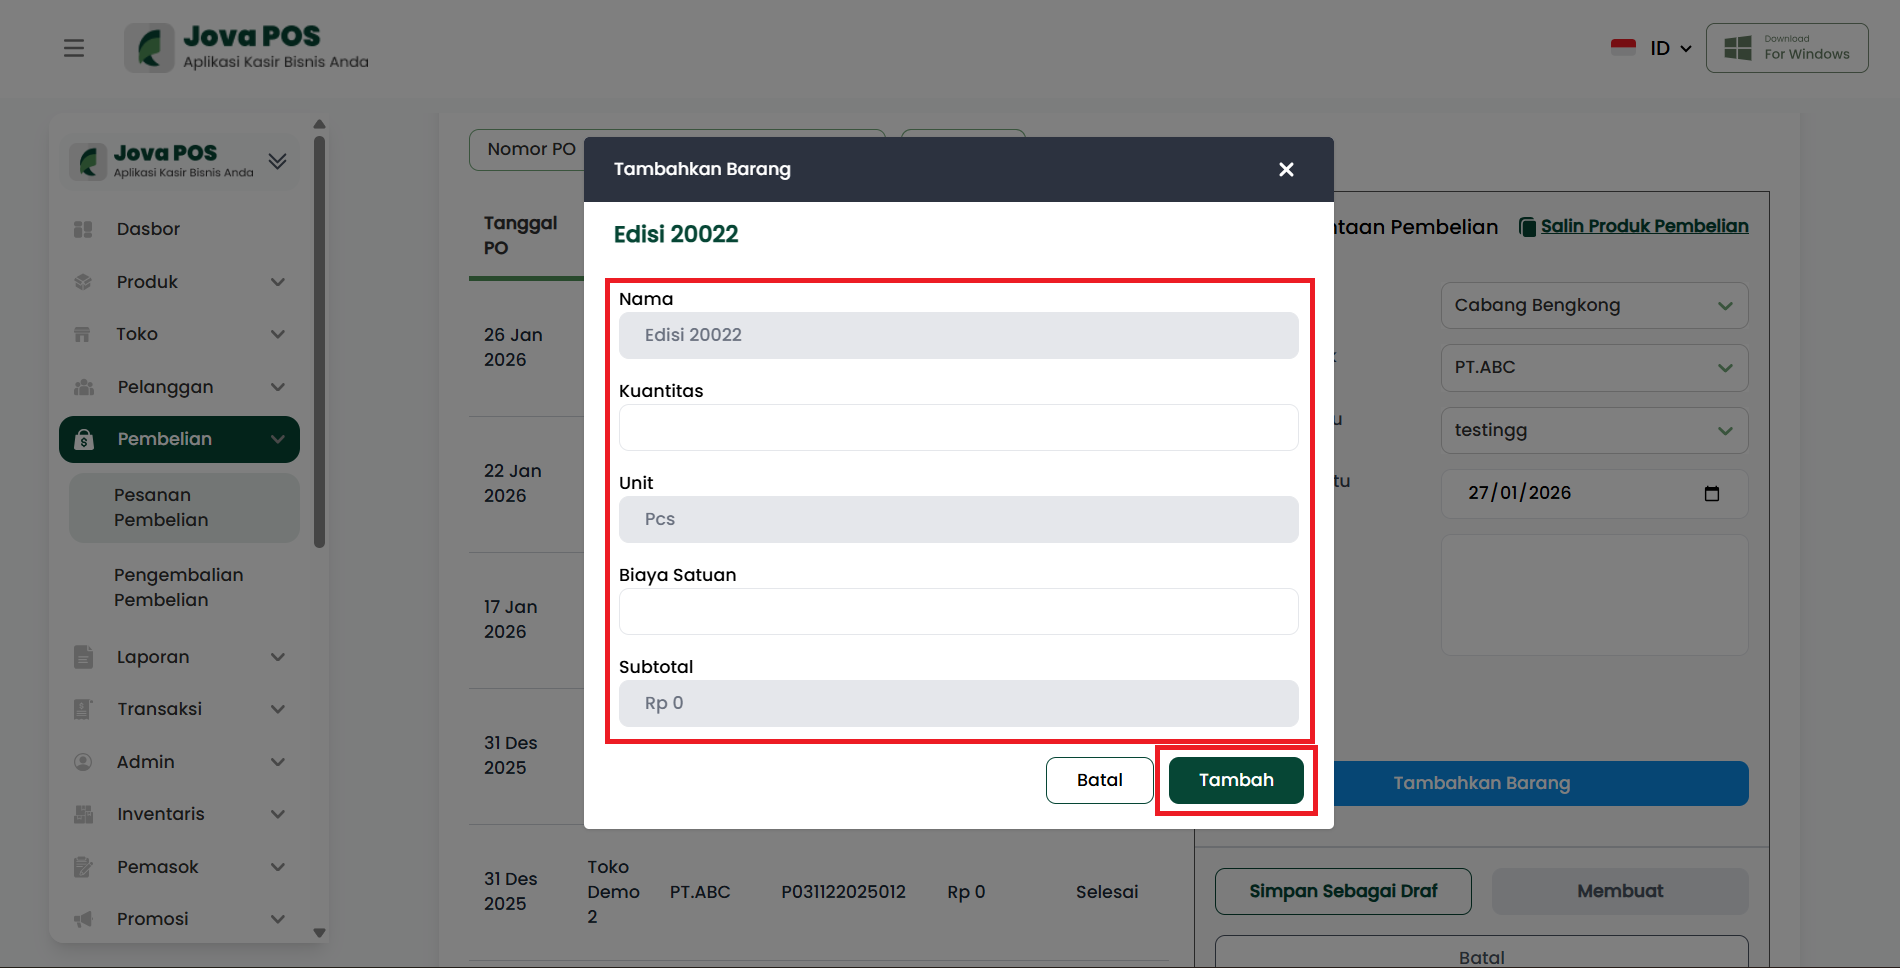
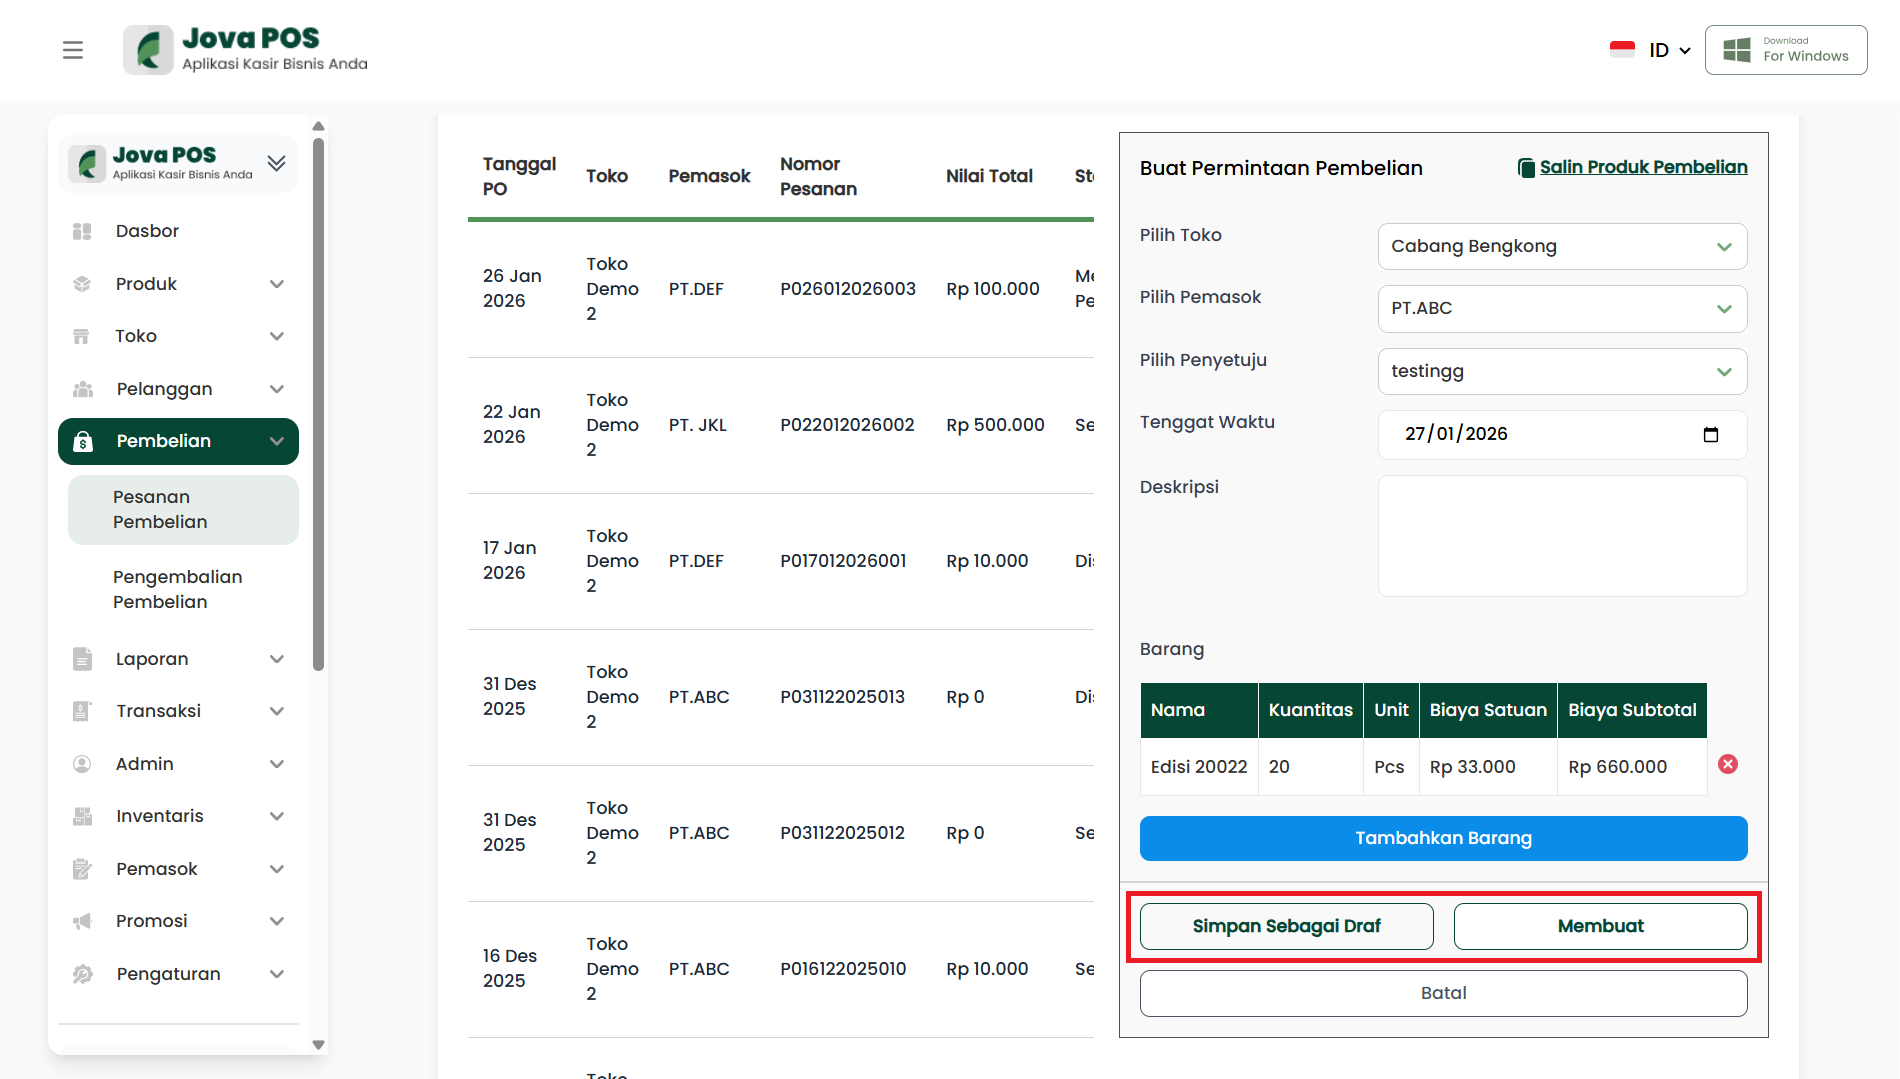
Tips:
- If you choose Save as Draft, the order will go to the Draft tab and can be updated or approved later.
- If you choose Create, the order will go directly to the Approval tab for immediate processing.
2. Approval Tab
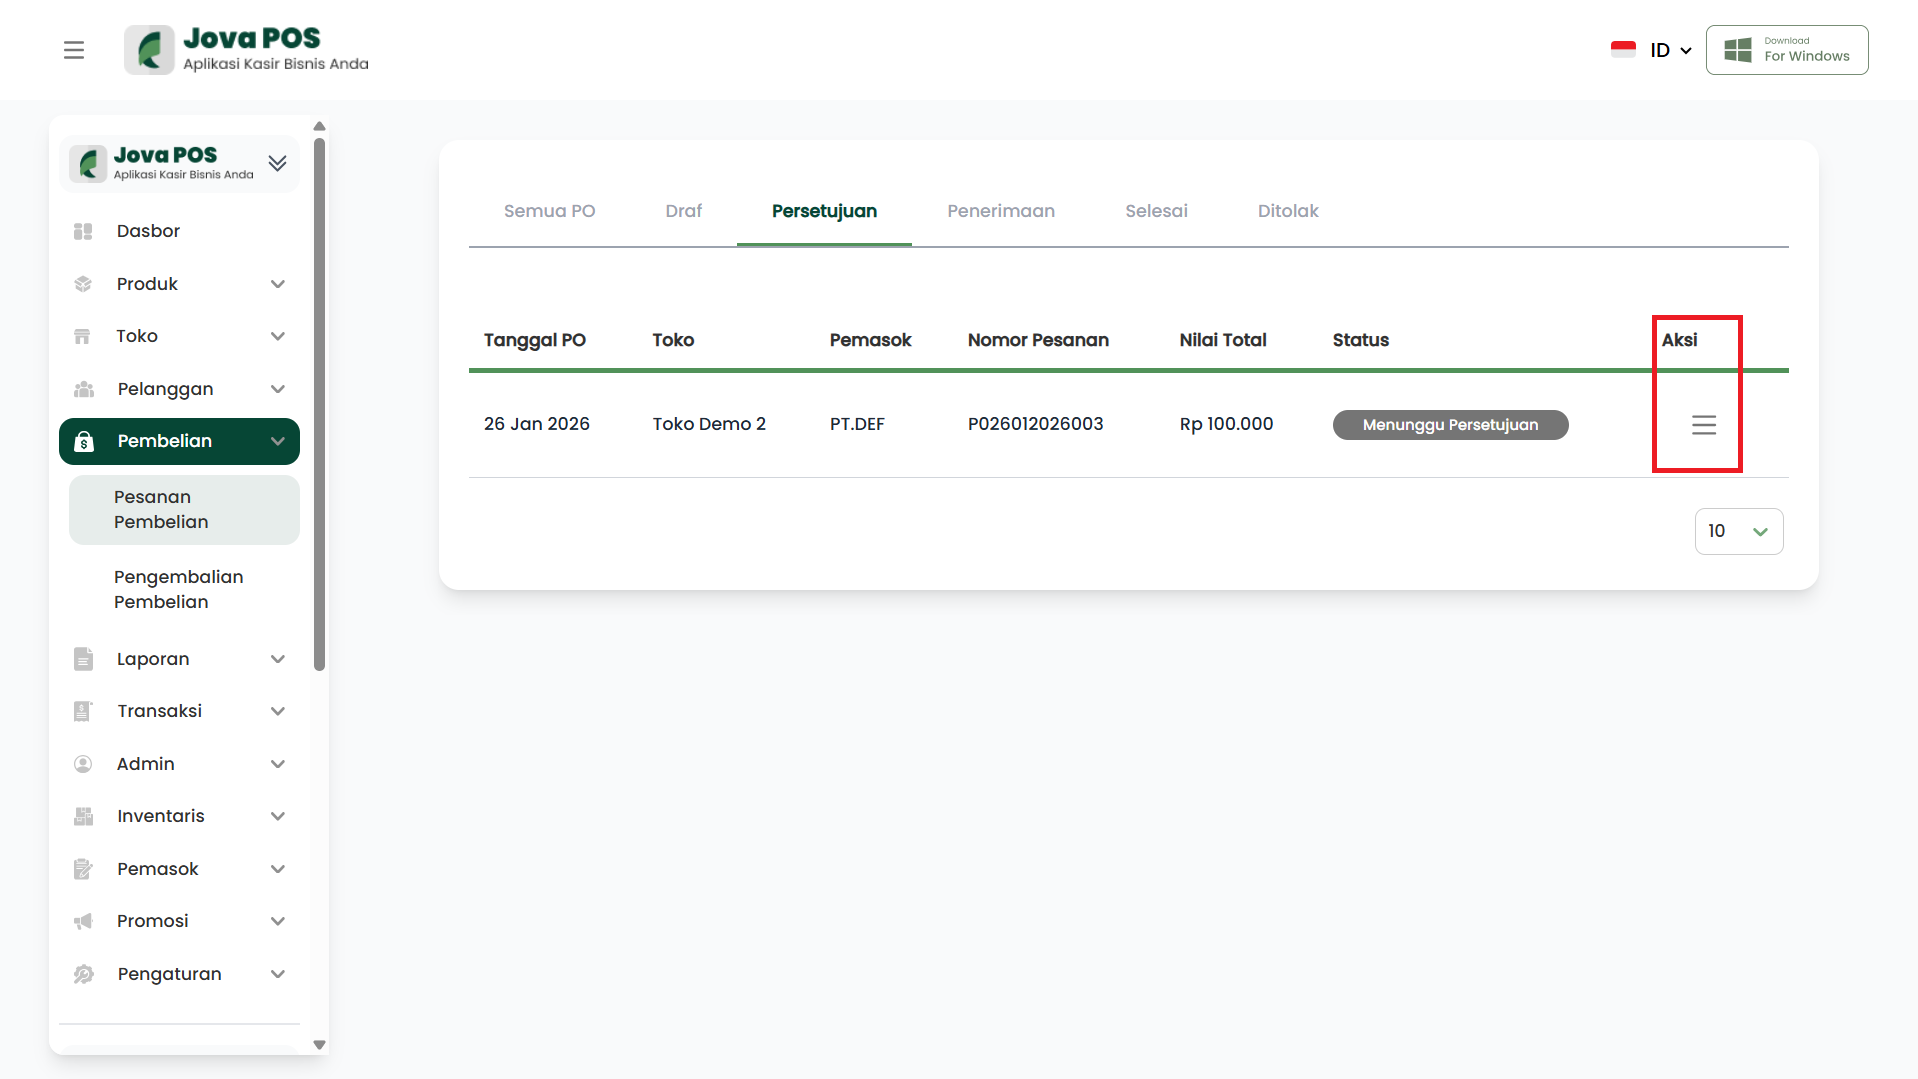
After an order is created, if you choose Create, it will appear in the Approval tab. Here, you can view order details and pending approval status. The process in this tab involves double-checking submitted orders before deciding whether to proceed with receiving or canceling.
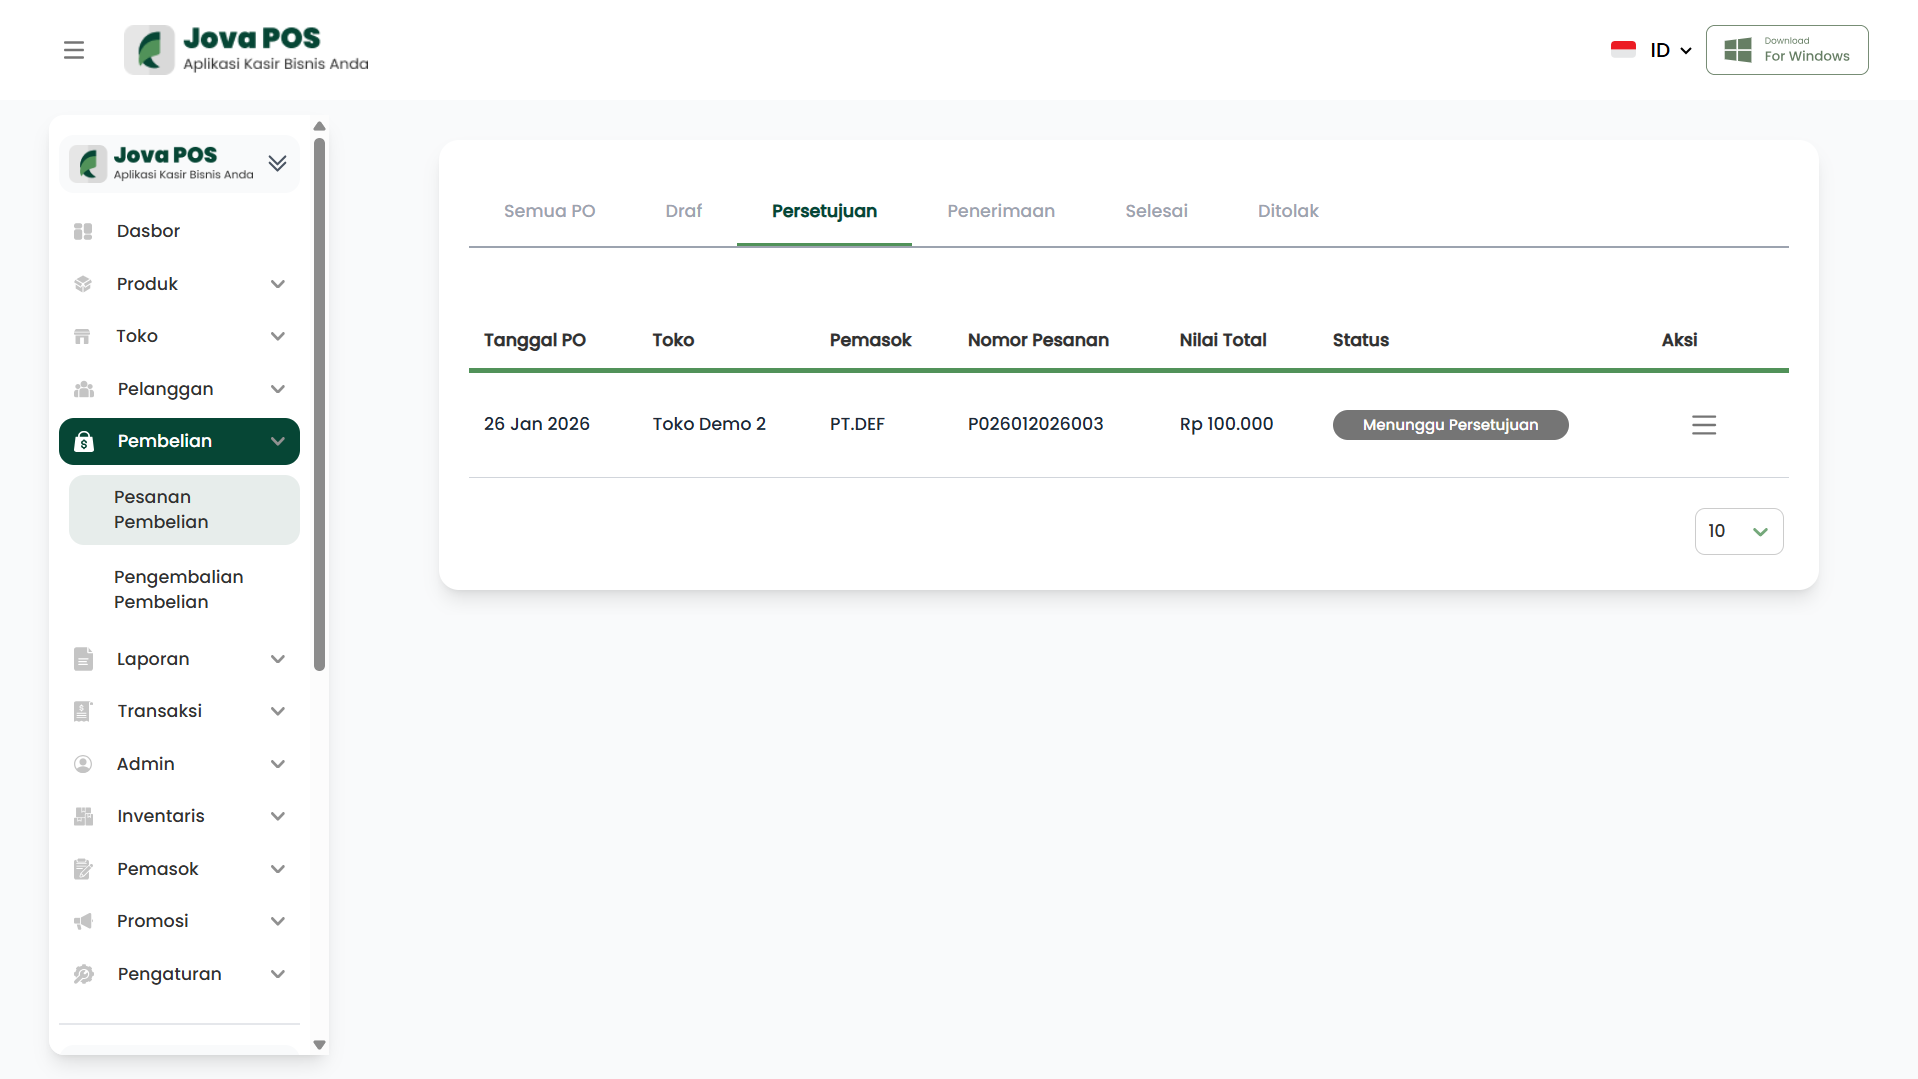
Approval Tab Functions:
-
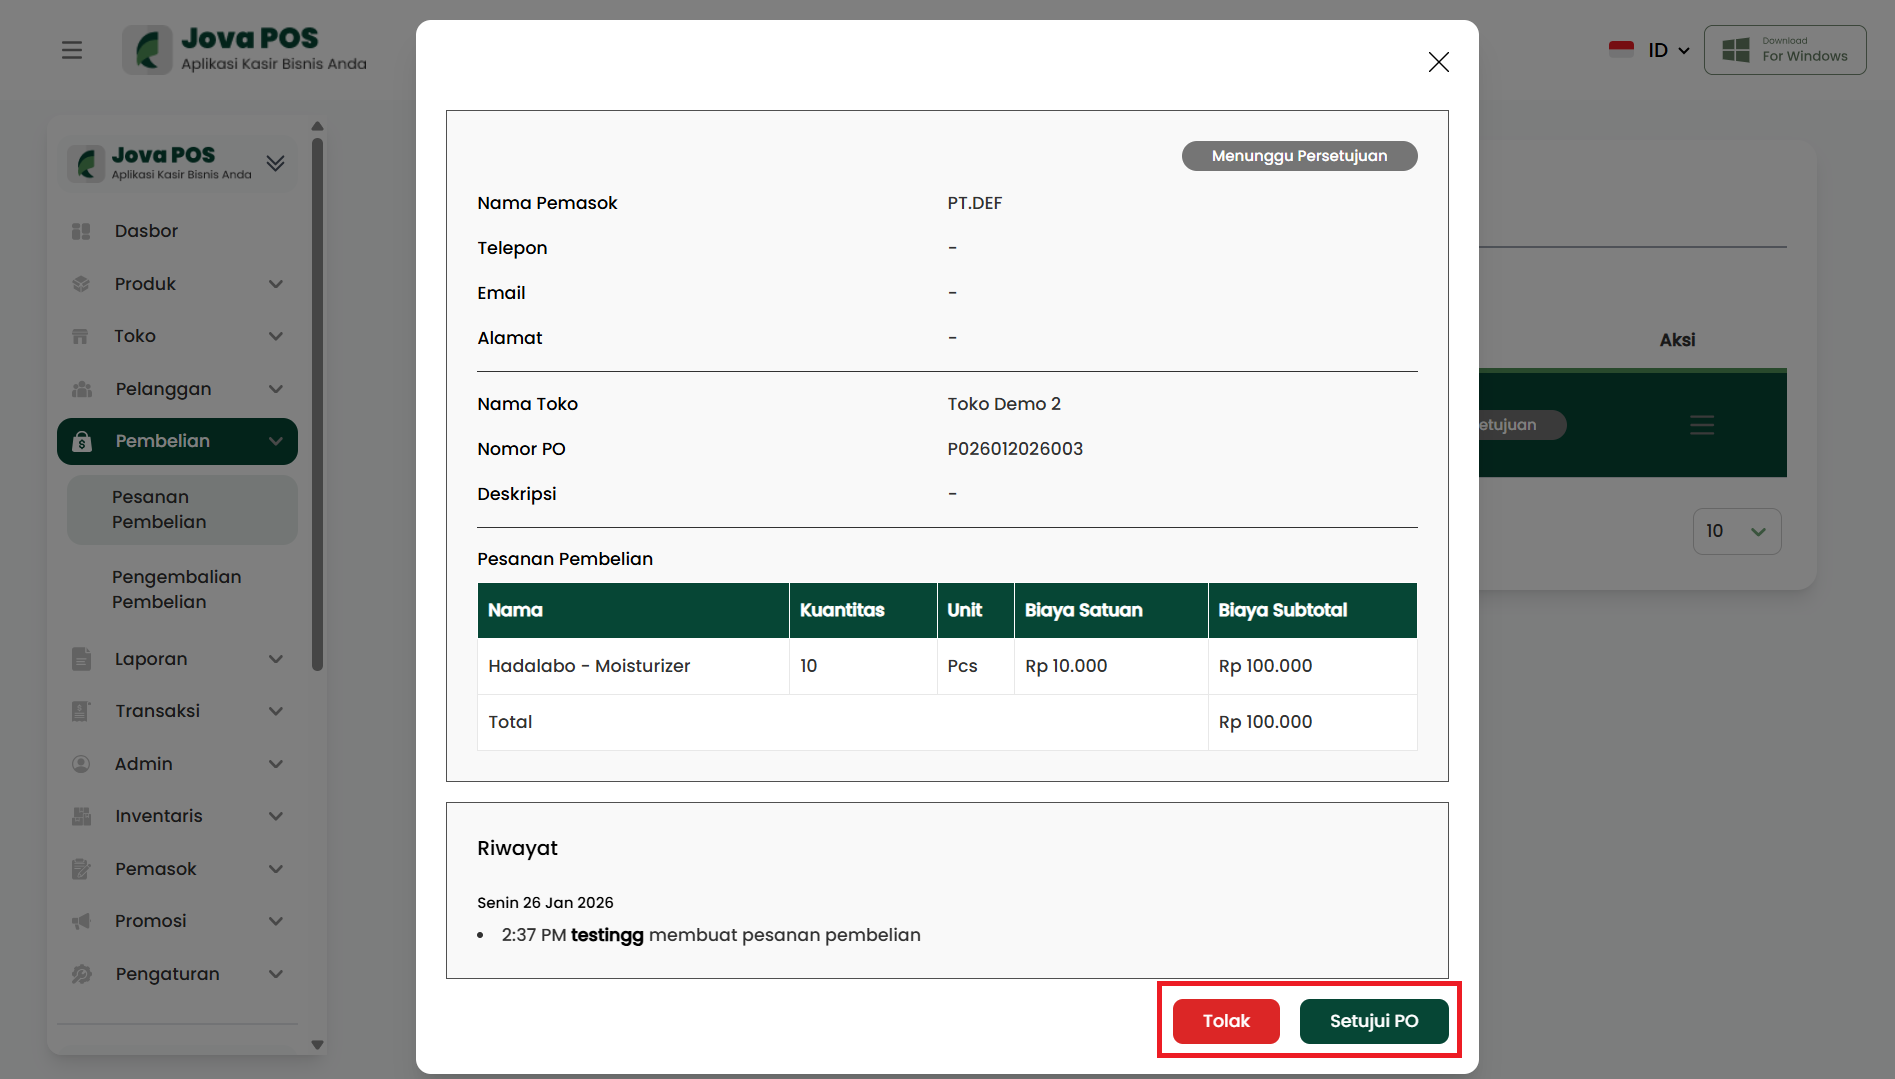
Order Details: Allows users to view complete order information including supplier data, PO number, item details, quantity, unit cost, and subtotal cost.
-
Order Status: At this stage, the order status will be marked as Pending Approval until a decision is made by the authorized party. If approved, the order will proceed to the Receiving tab. If rejected, the order will not proceed.
-
Actions: In this section, there are two main options:
- Approve PO: Click to approve the order and move it to the Receiving tab.
- Reject: Click to reject the order and remove it from further processing. Rejected orders will appear in the Rejected tab.
Approval Tab Explanation:
- Order Details: Displays information such as store name, supplier, PO number, and item details including item name, quantity, and unit price.
- Status: Marked with "Pending Approval" status indicating the order is awaiting a decision.
- Actions:
- Approve PO to proceed with receiving items.
- Reject to cancel the order.
- Click Action to view further details and confirm approval.
Options:
- Click Approve PO to approve the order and proceed to receiving.
- Click Reject to cancel the order.
3. Receiving Tab
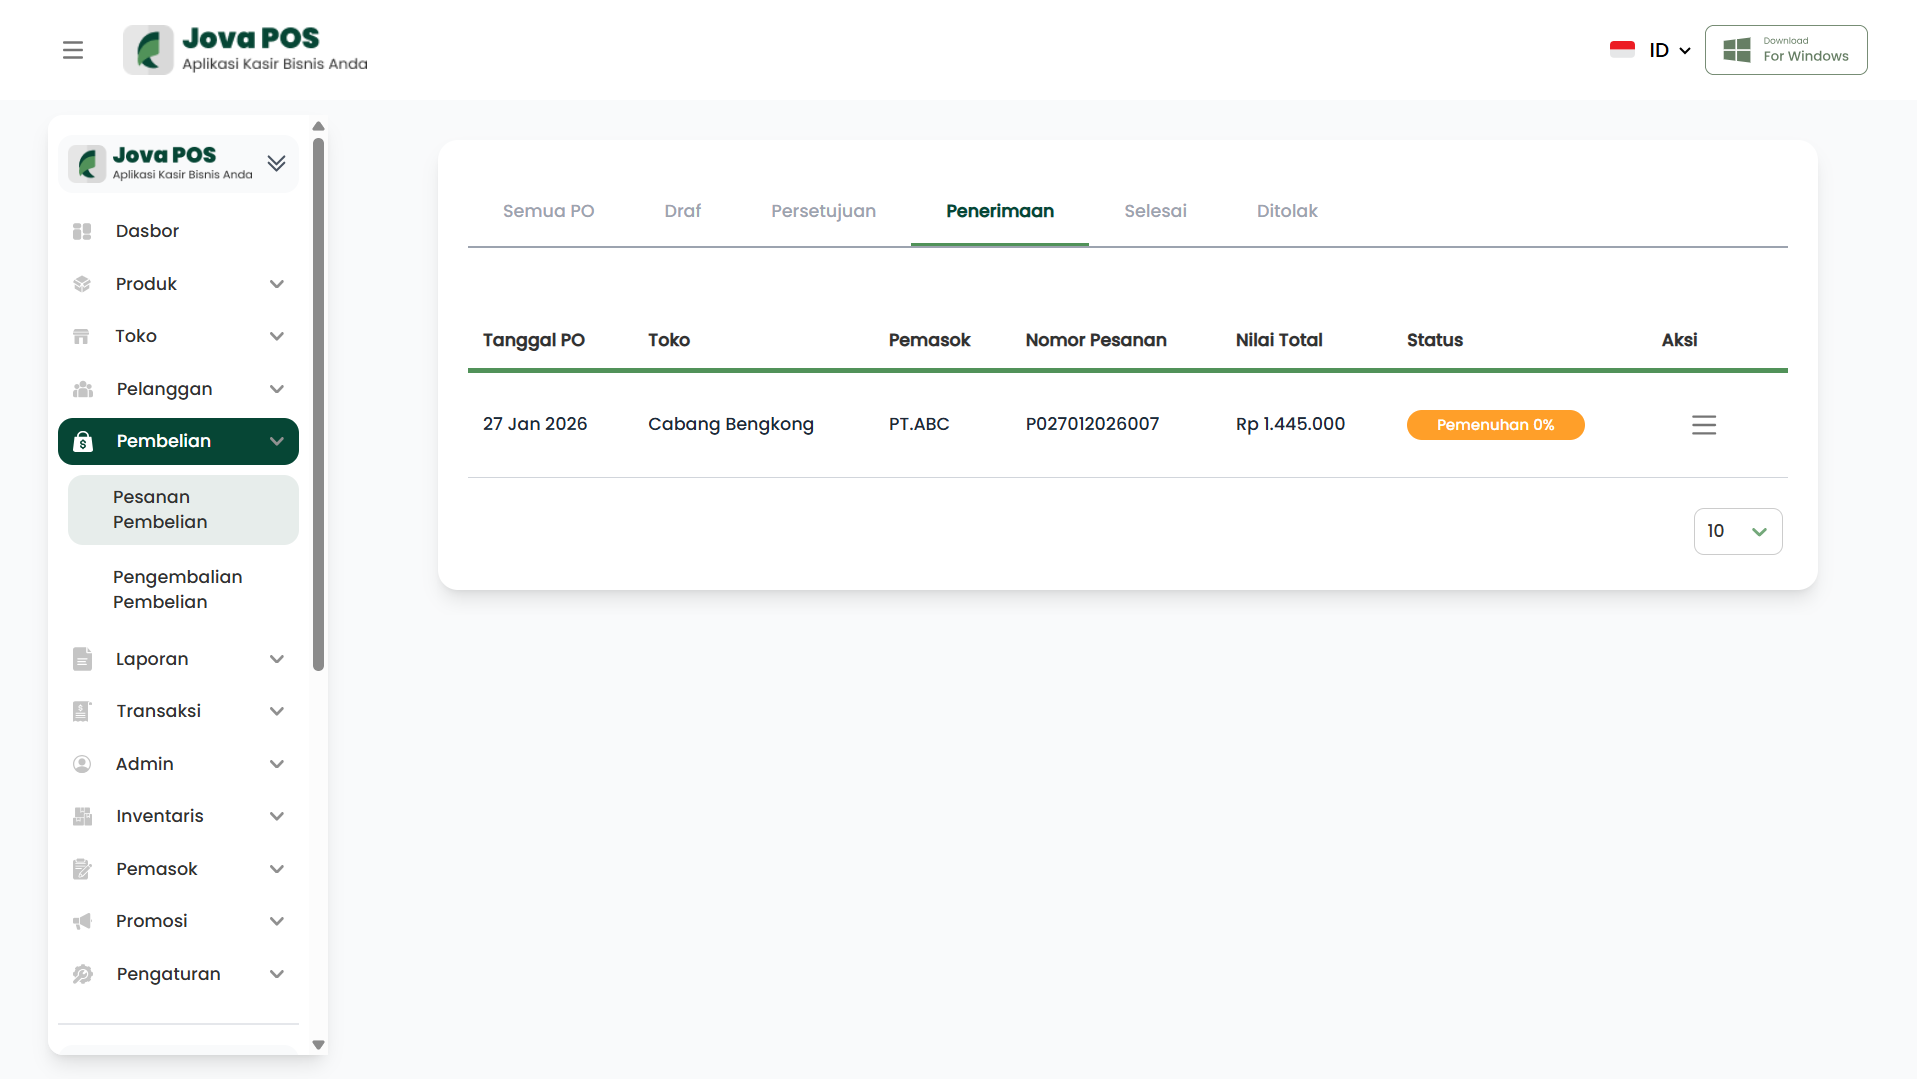
After an order is approved in the Approval tab, it will move to the Receiving Tab. In this tab, users can view order details and begin processing item receipt.
Receiving Tab View
In the Receiving Tab, users can view order details such as:
- PO Date: The order date
- Store: The store that placed the order
- Supplier: The supplier providing the items
- Order Number: The order number for reference
- Total Value: The total value of the order
- Status: At this stage, the status shows "Receiving 0%", indicating that item receipt has not yet been done.
Receiving Process Steps
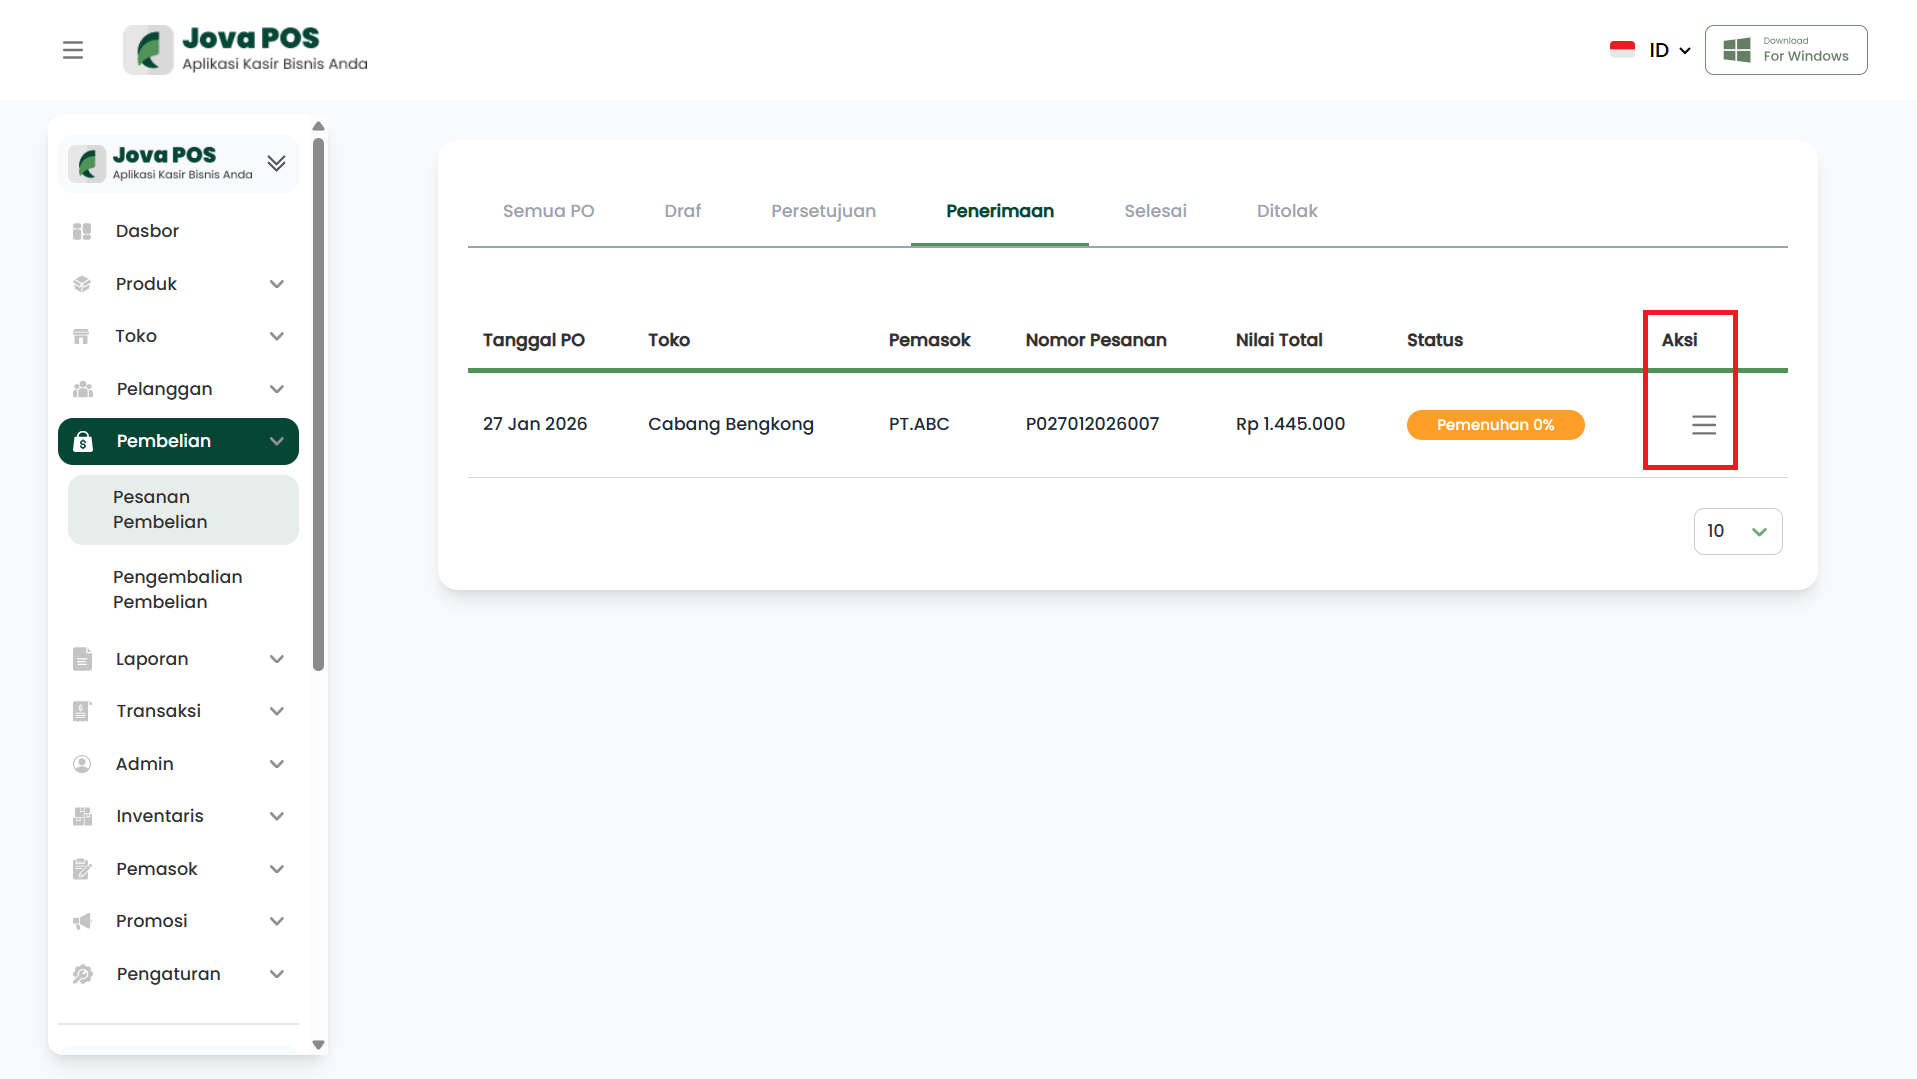
1. Click Action Button on the Order
In the Receiving Tab, find the order with Pending Receiving status and click the Action Button next to the order to process.
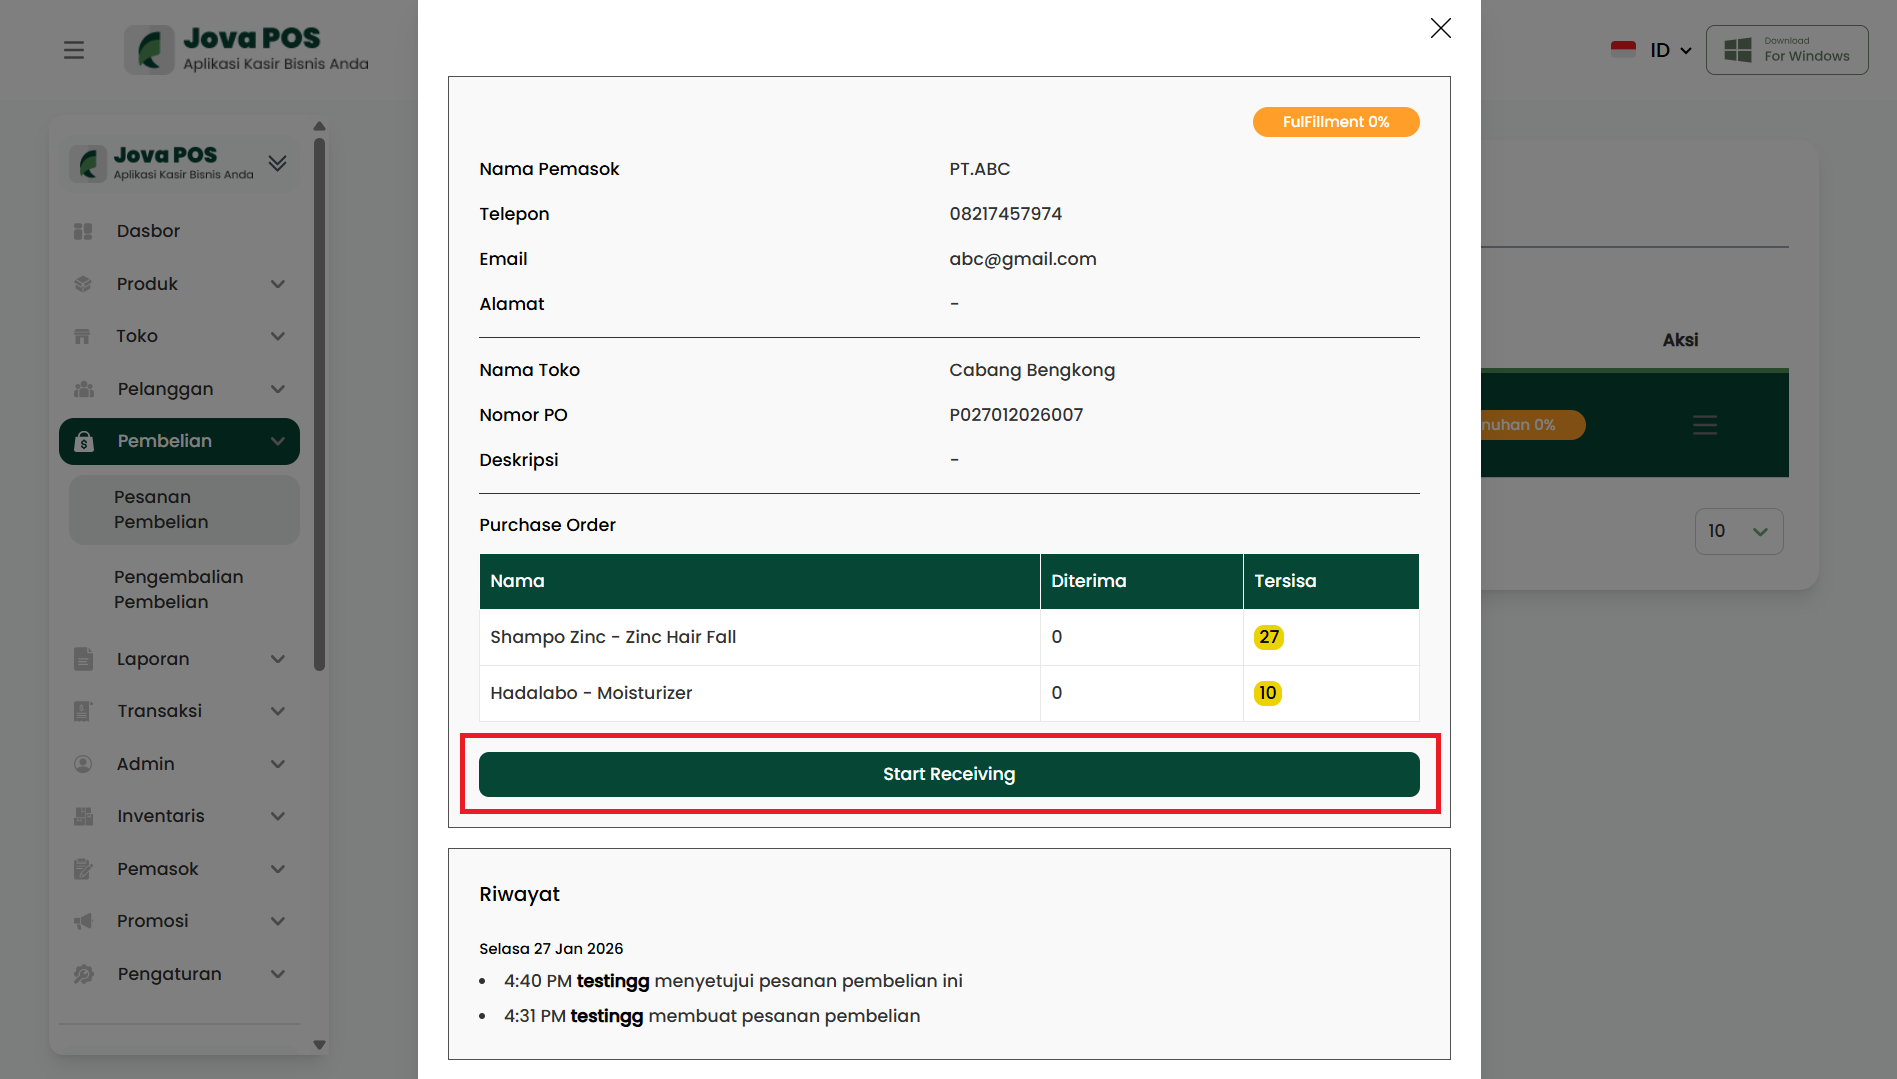
2. Click Start Receiving
After selecting the Action Button, click Start Receiving to begin the item receipt process.
3. Select Warehouse
On the Start Receiving page, select the Warehouse where the items will be received, for example Cabang Bengkong.
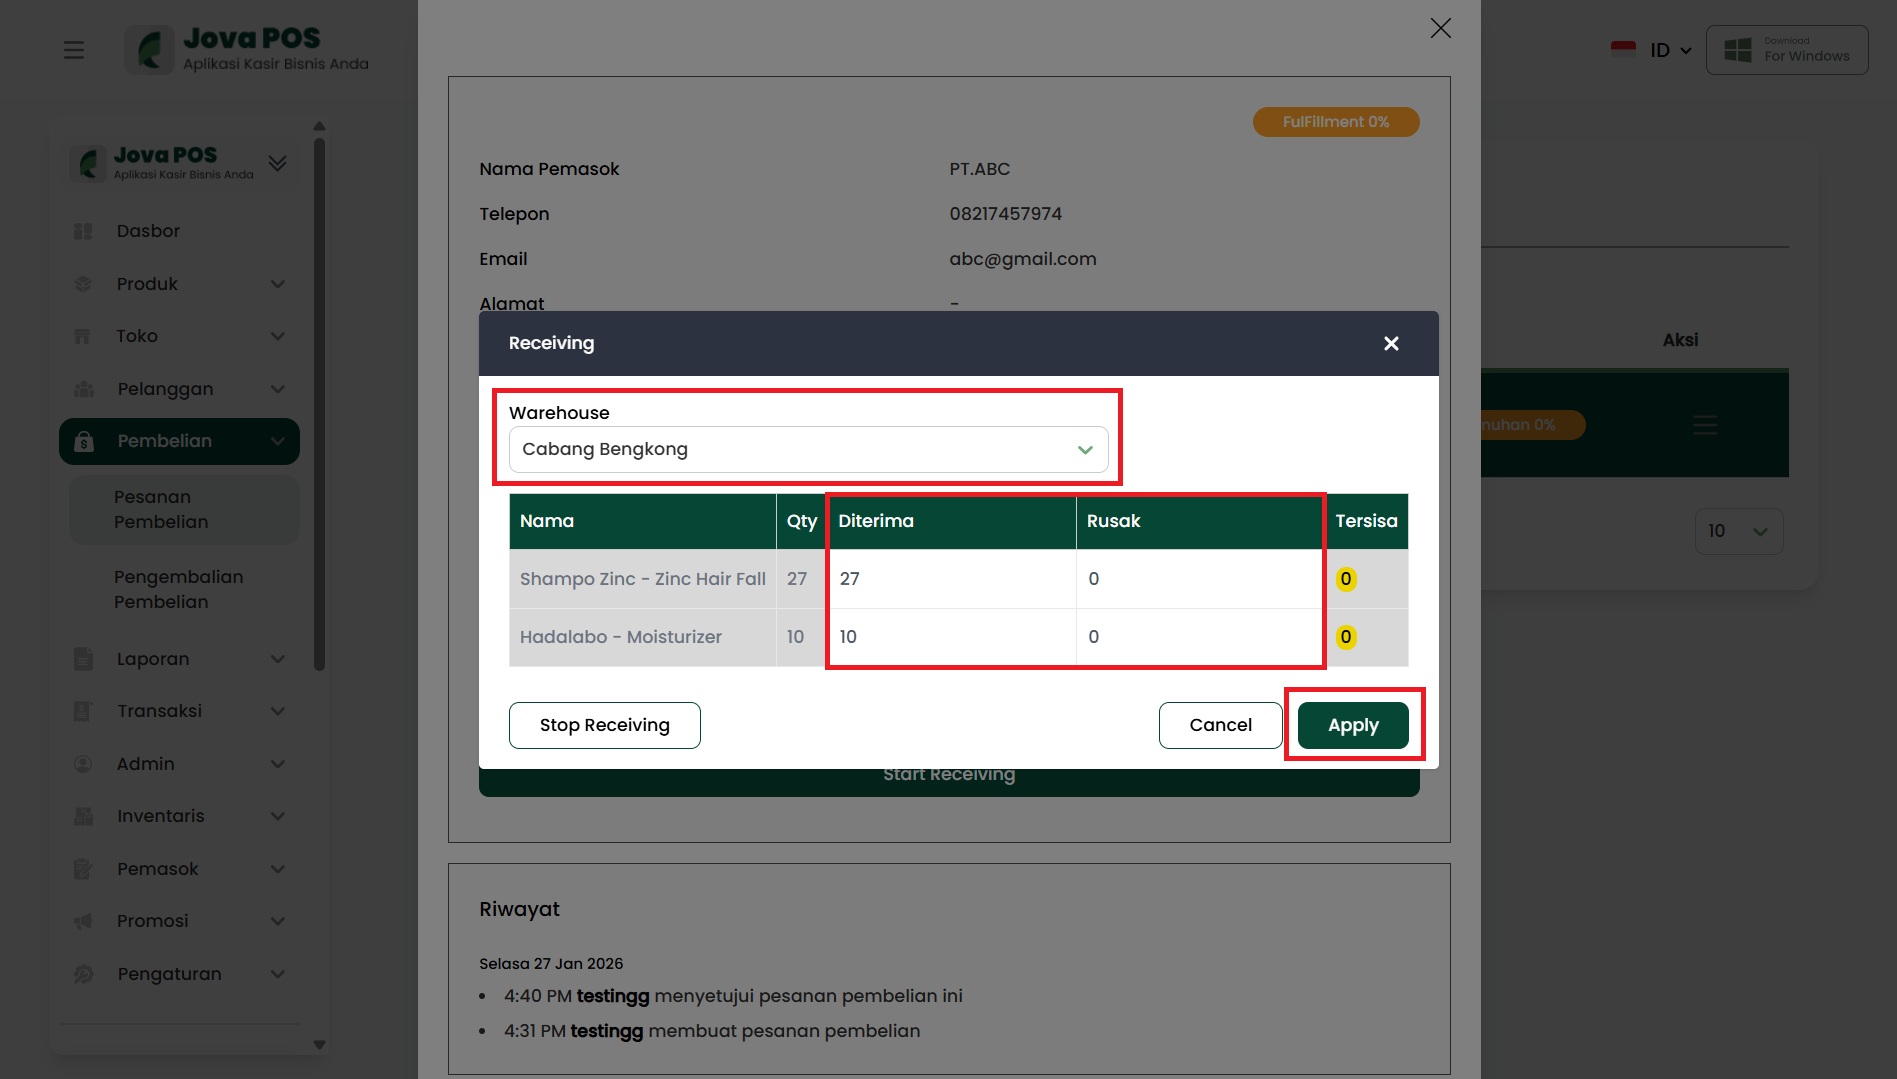
4. Specify Received and Damaged Item Quantities
Enter the quantity of items Received and Damaged. The system will automatically calculate Remaining based on the received quantity.
5. Click Apply
After entering the received and damaged quantities, click the Apply button to complete the receipt process.
Completed Tab - Purchase Orders
The Completed tab contains a list of purchase orders that have been fully processed, including payments made. In this tab, users can view completed order details and confirm that payment has been processed.
Completed Tab Process Steps
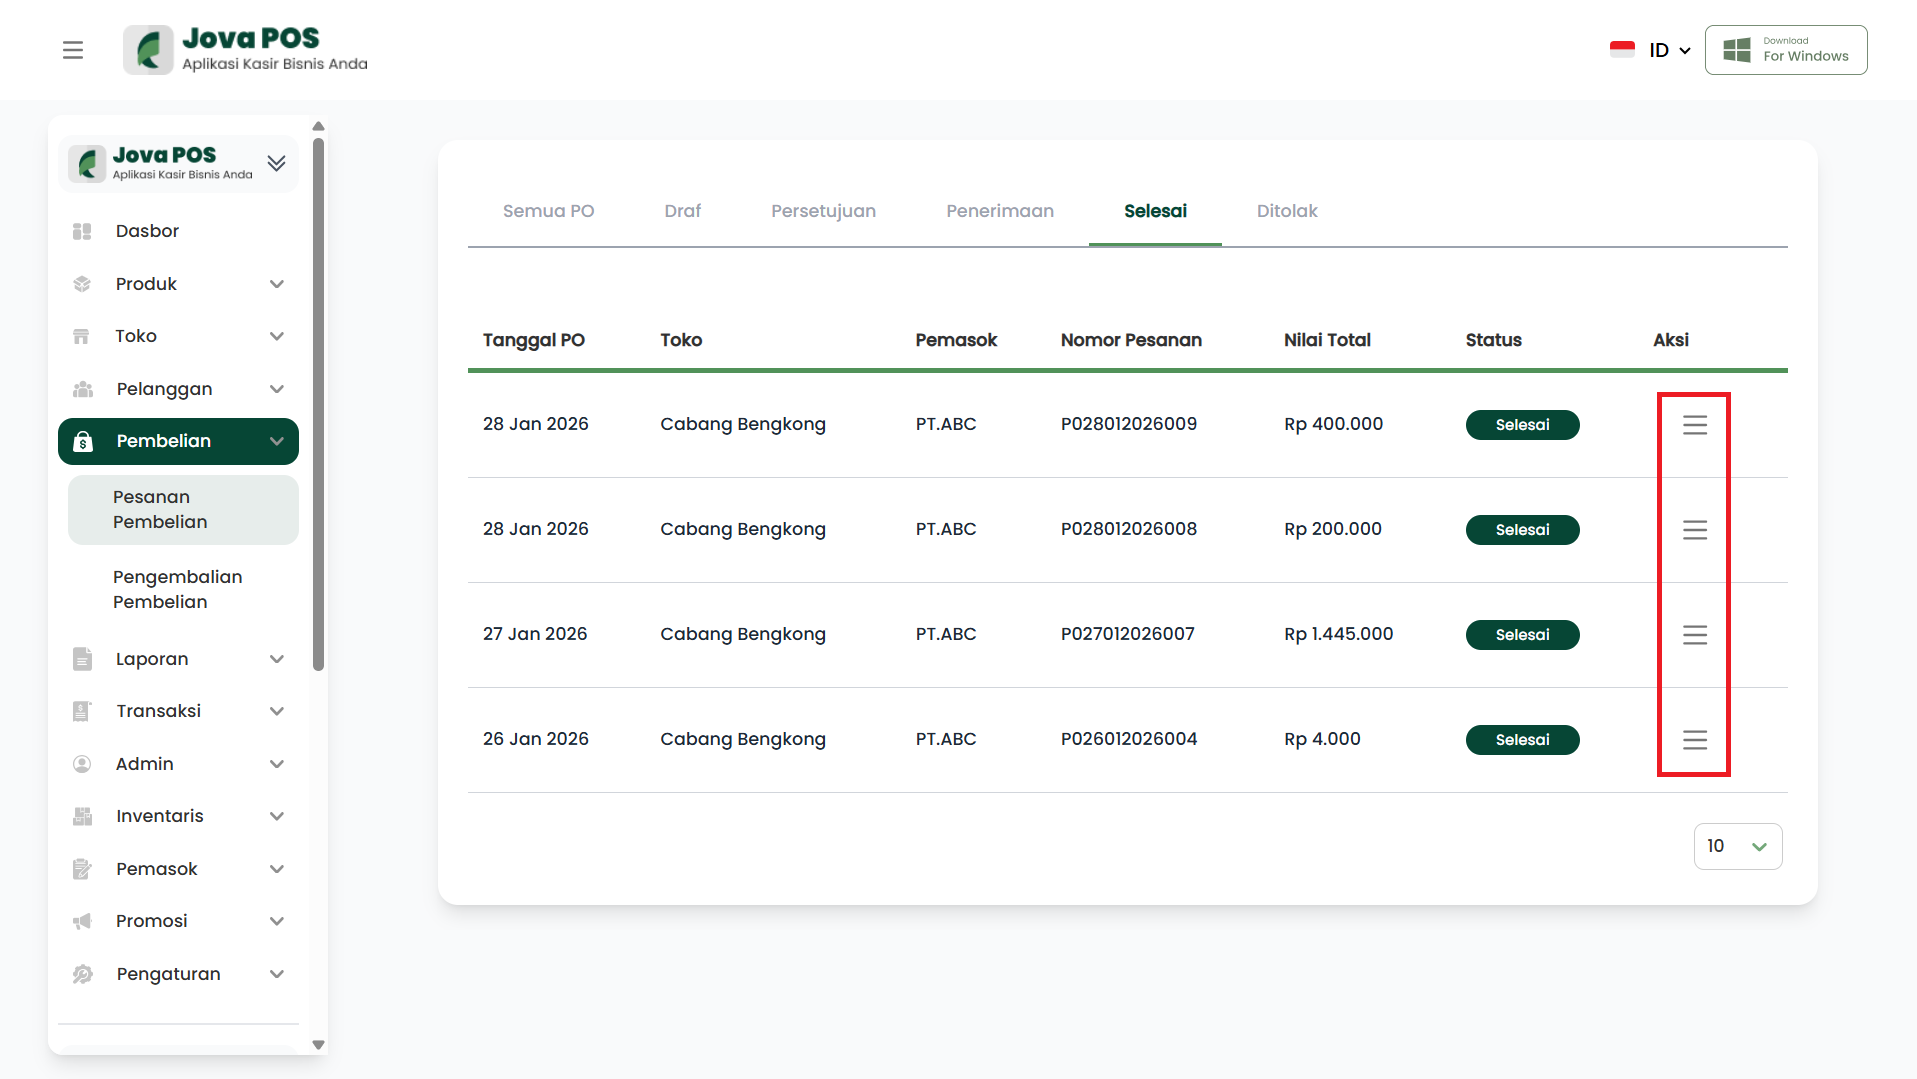
1. Click the Action Button
In the Completed tab, the list of completed orders will appear. In the Action section, click the button on the right to open the completed order details.
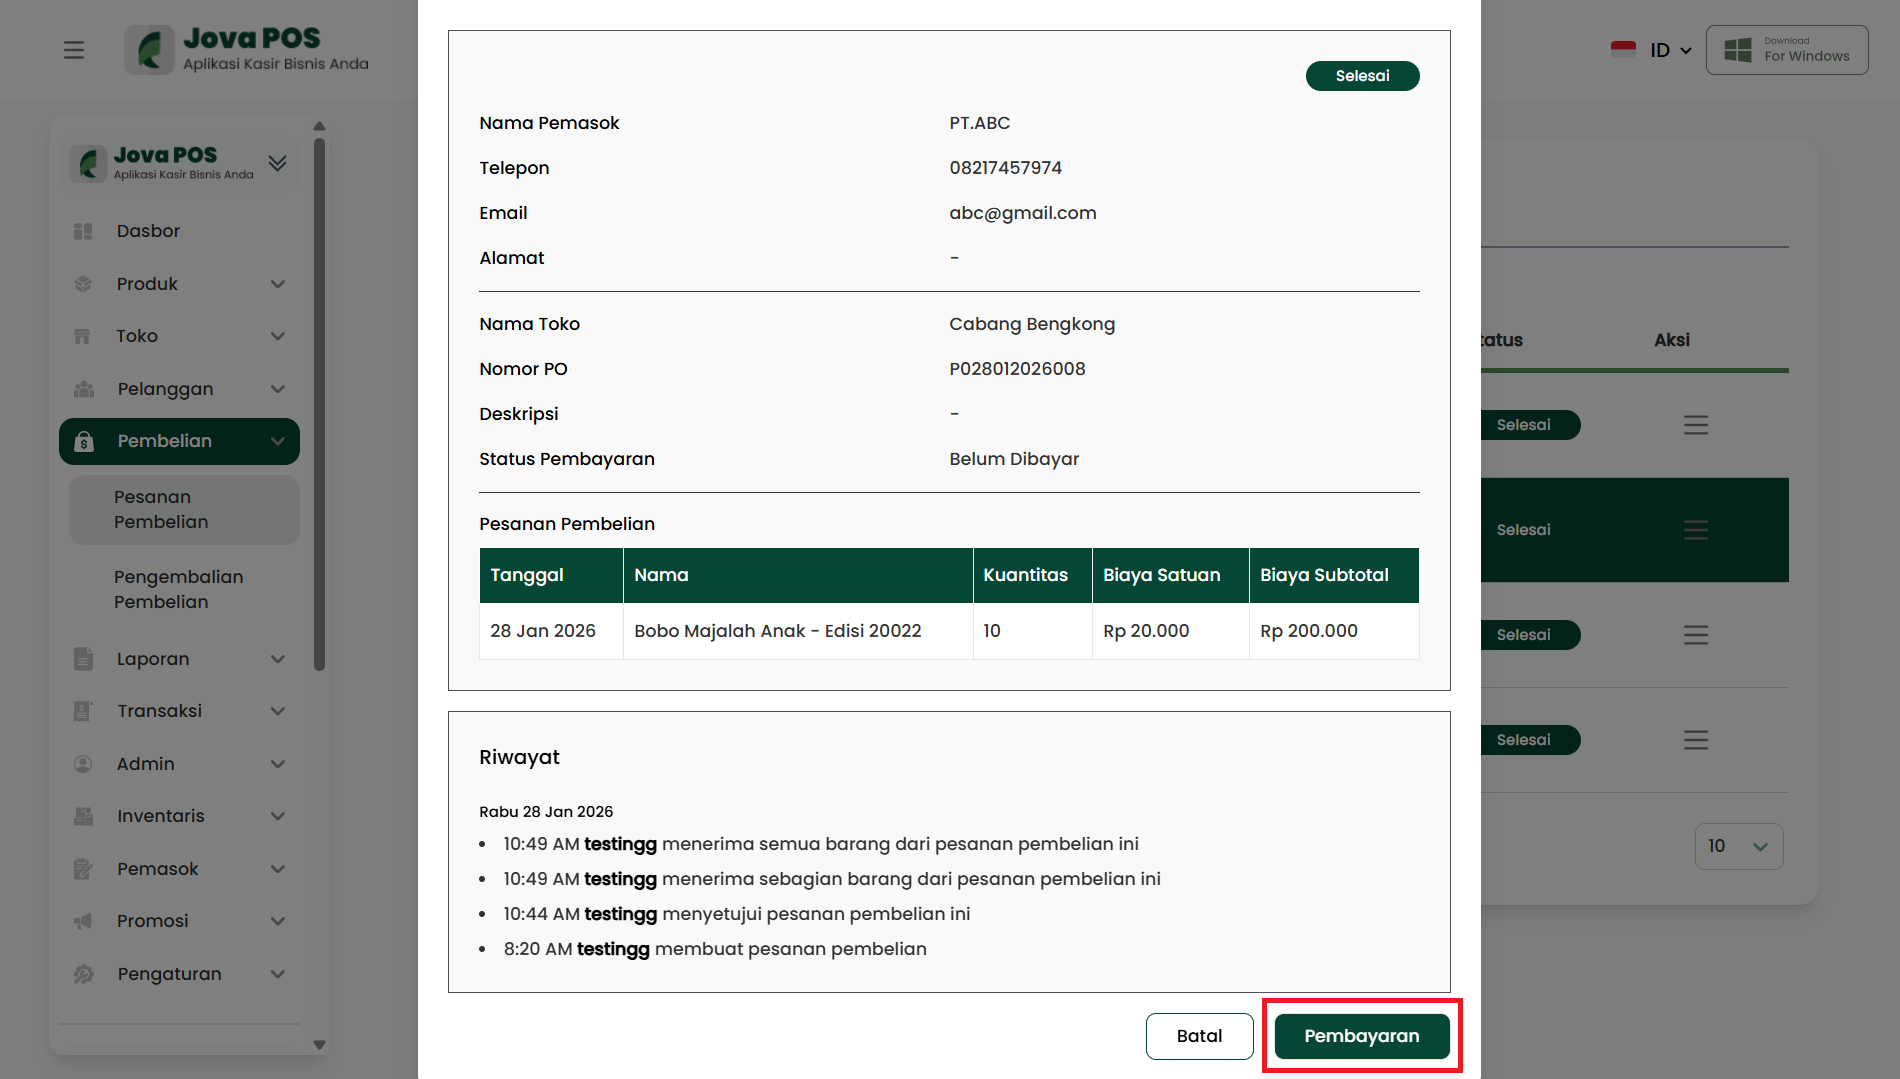
2. Click the Payment Button
On the order details page, if payment has not been made, click the Payment button to proceed to the next step.
3. Select Payment Method
After clicking the Payment button, select the appropriate payment method (e.g., Cash or Transfer), then click the Payment button to complete the transaction.
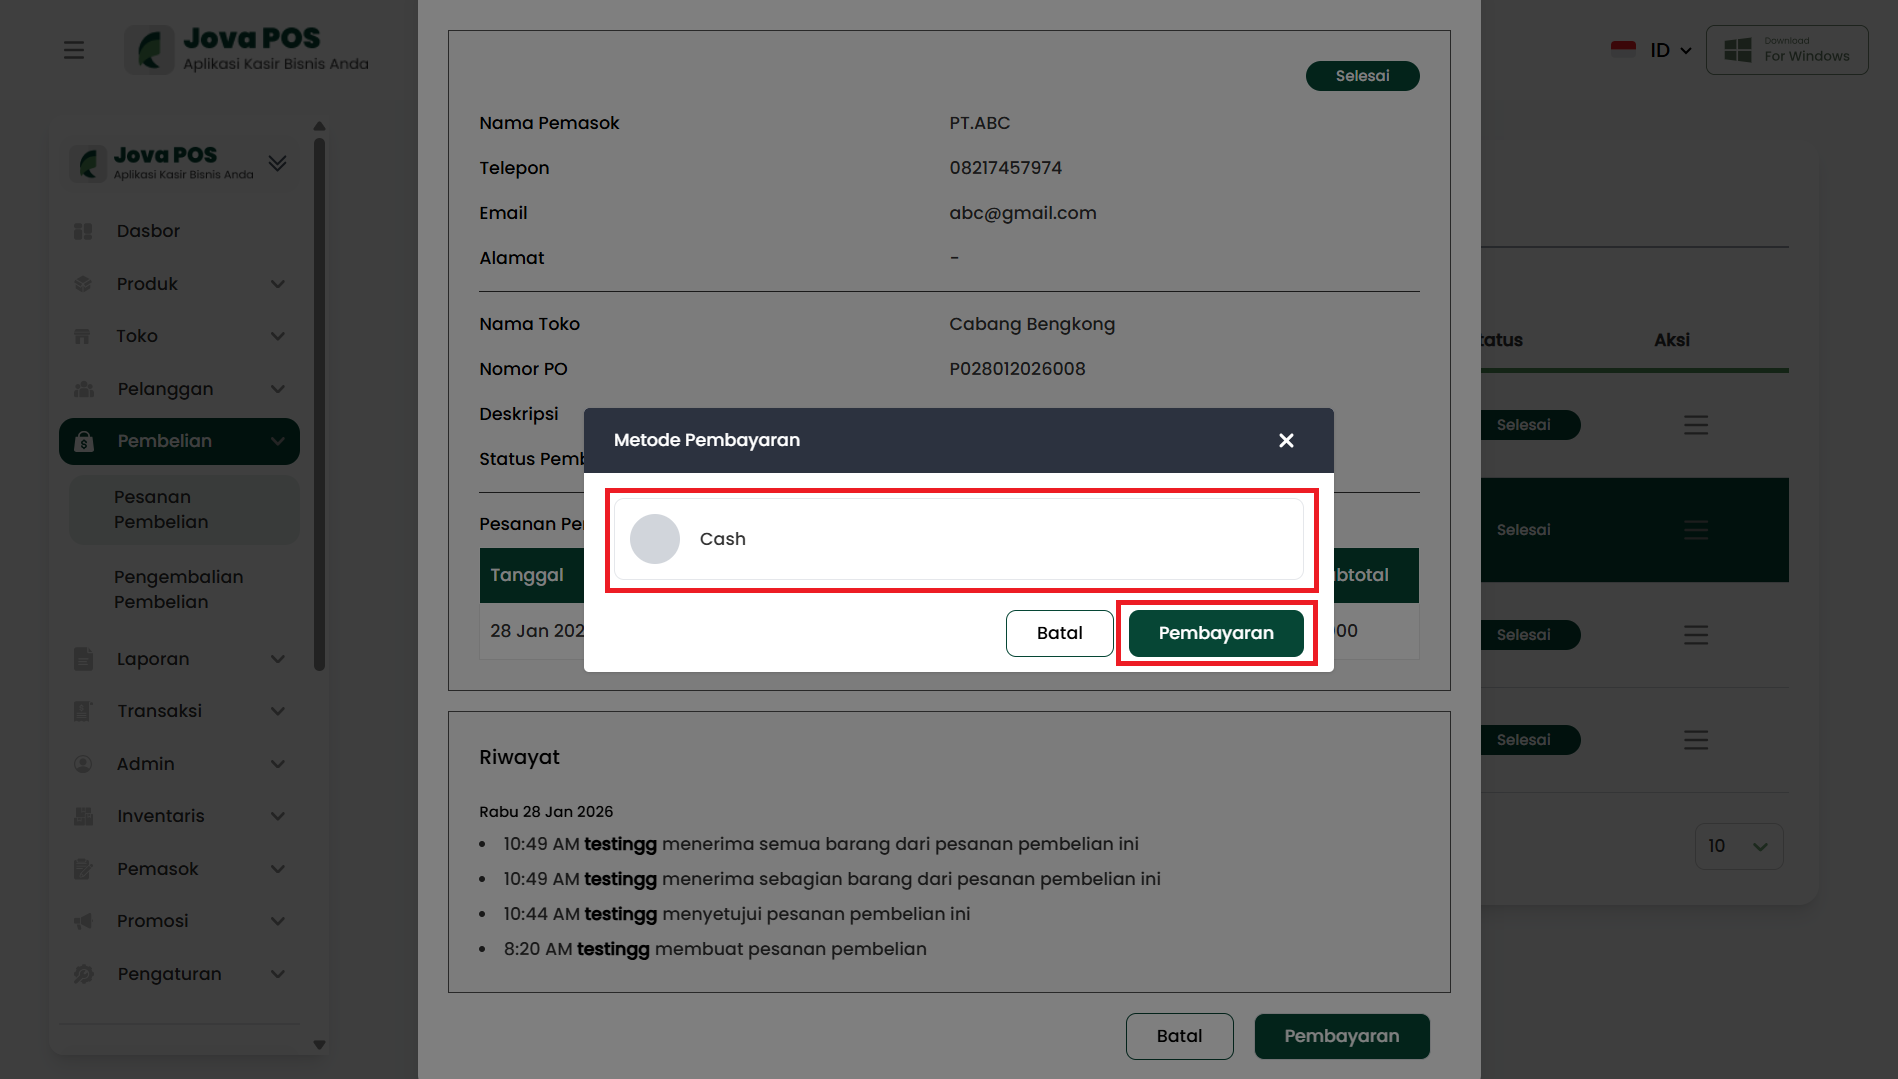
4. Payment Successful
After payment is completed, the order status will be updated to Completed and the transaction will be recorded in the system. Completed orders will appear in the Completed tab.
Rejected Tab
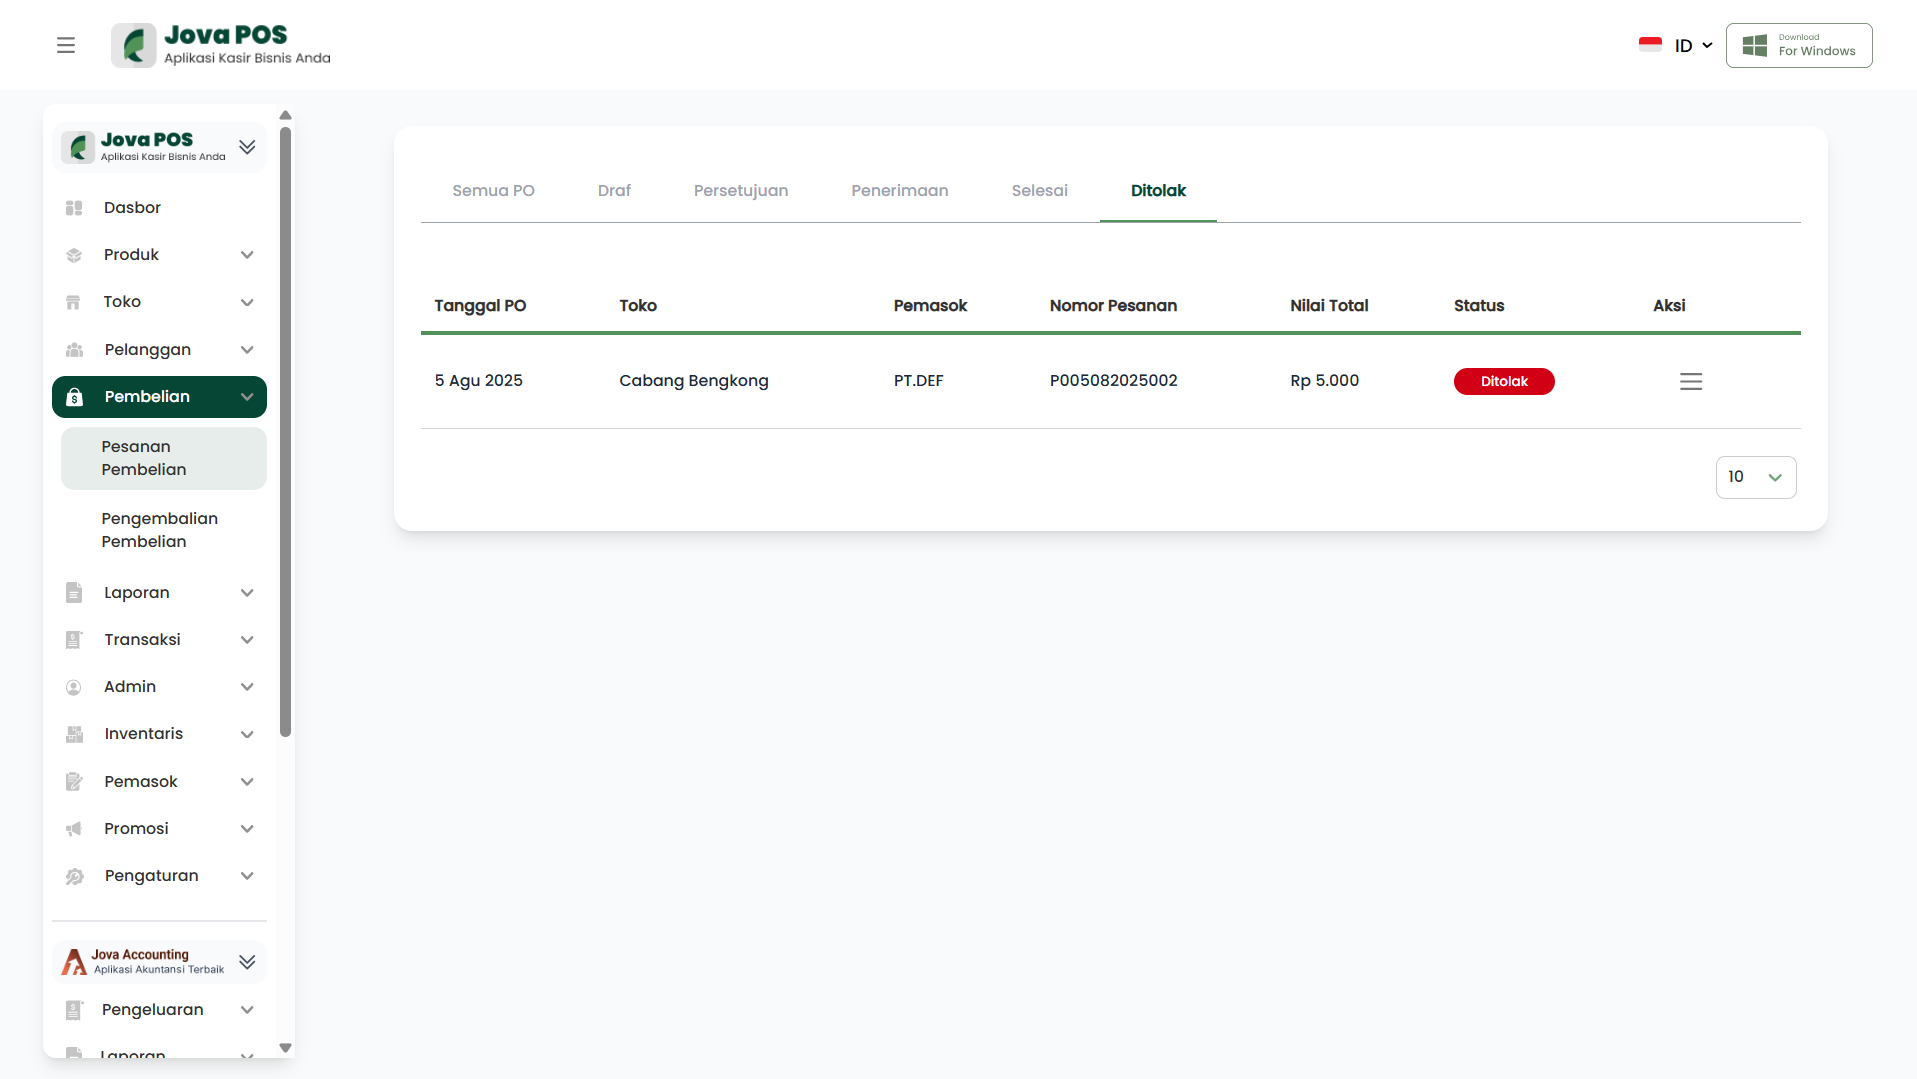
After an order is rejected, it will be moved to the Rejected tab. In this tab, users can view the list of canceled or rejected orders.
Rejected Tab View
In the Rejected tab, you will see the following information:
- PO Number: Displays the reference number for the rejected order.
- Store: The name of the store that placed the order.
- Supplier: The name of the supplier providing the items.
- Total Value: The total cost to be paid for the order.
- Status: At this stage, the order status will show as Rejected.
- Action: The only available action in this tab is to view history and order details. No other actions can be taken after an order is rejected.
Rejected Orders List View
Below is the display of the rejected orders list. In the Action section, there are no options to approve or edit the order.
Viewing Rejected Order Details
To view further details of a rejected order, click the Action button on the relevant order row. You will be directed to view detailed information about the order, including the reason for rejection and order status history.
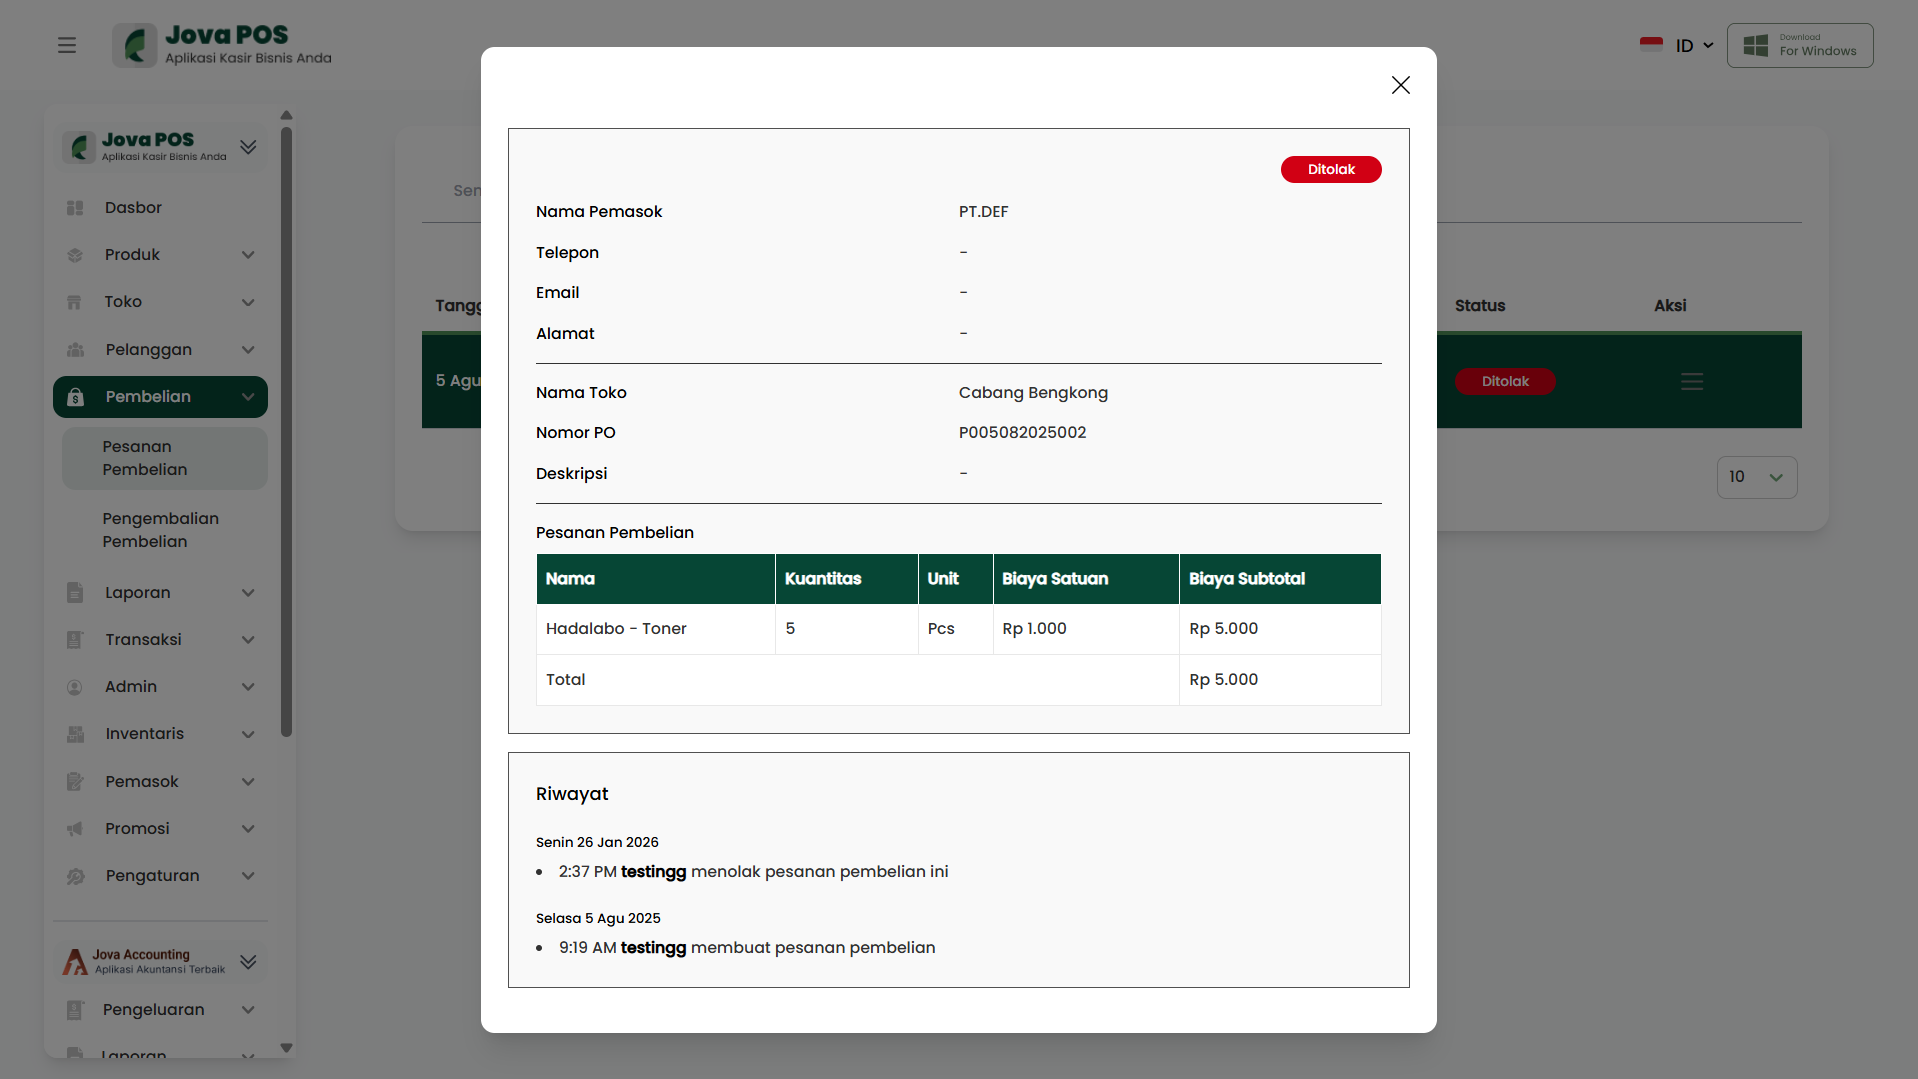
On the details page, you can view:
- PO Number
- Supplier Name
- Store Name
- Order Description
- Payment Status
- Activity History
By using the Rejected tab, users can manage and monitor canceled or rejected orders for further action, and ensure all transactions are properly recorded.